Download the Excel template from the Support Portal to get started with the Simplified Loader template. You need an active Support Portal account to download a template. Once you have the Template downloaded, follow the steps in this guide to set up the Template for the first time.
It is recommended that the steps are carried out in the order presented.

The first step in setting up a Simplified Loader Template is to unlock the Admin Panel, located in the Setup section of the Simplified Loader toolbar.
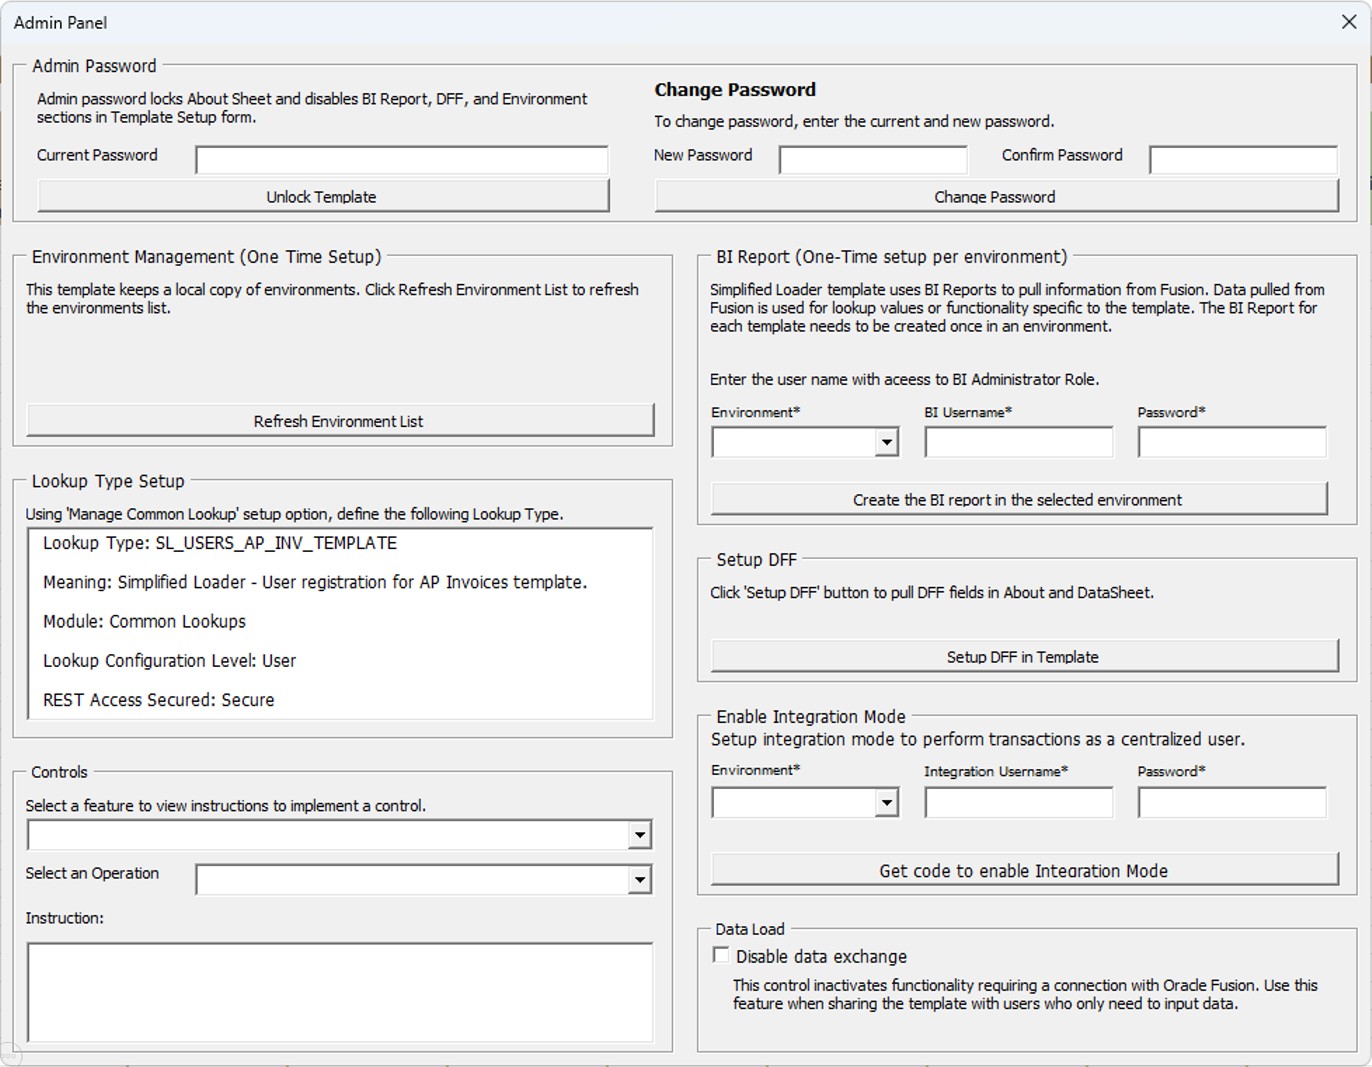
The Admin Panel contains a number of the operations required to set up the Template. These operations are password protected as they need to be completed by the user responsible for the initial set-up of the Template and, therefore, should not be available for modification by day-to-day users.
1. Navigate to the Simplified Loader Admin Panel button in the Setup section of the Simplified Loader toolbar.

2. By default, the Admin Panel is protected by a password. The Admin Password is required to update either the Admin Panel or the About worksheet. The default password is admin. To change the password, enter the current and new passwords and click the Change Password button.

3. To use the features available in the Admin Panel, unlock the Template by entering the Current Password and clicking the Unlock Template button.
After unlocking the Template, the user receives the following message.
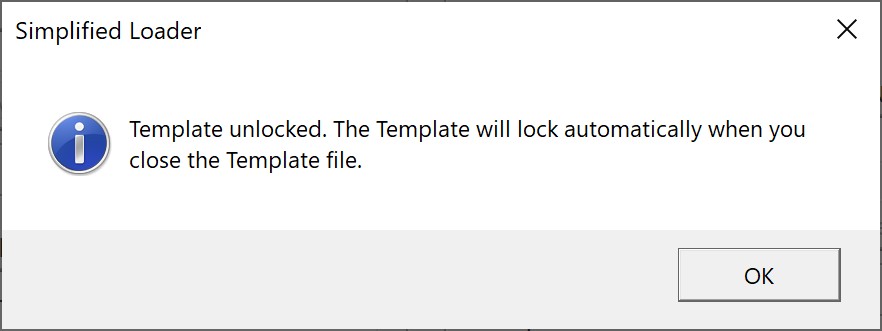
Clicking OK on this window will close the message and the Admin Panel.
4. Click on the Admin Panel menu option again to reopen. This will enable all options available to be used. If required, changes can now be made to the About sheet. Once the Template is unlocked, it remains unlocked for the session.
5. Whenever the Admin Panel has been unlocked, closing the Excel Template file will result in the following message.
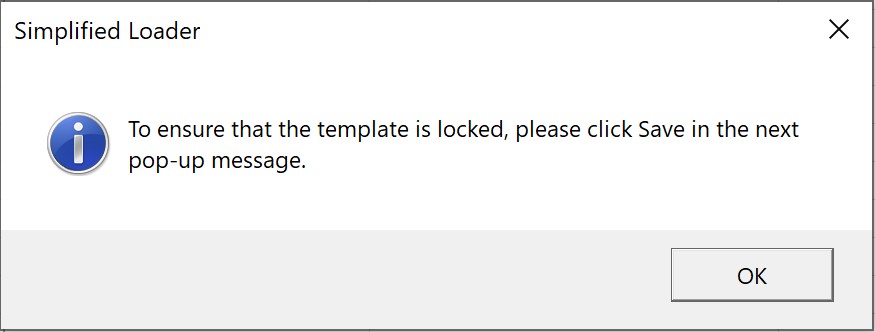
This is a reminder to the administrator that they need to save the file to ensure that the Admin Panel is locked before exiting the Template.
Click OK.
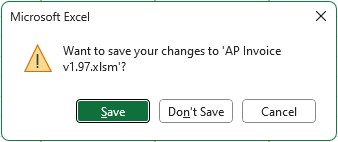
6. Click on the Save button before exiting the Template.
Simplified Loader templates exchange data with Oracle Fusion. The method used by Excel to do so can differ from one PC to another. The Simplified Loader Connection wizard helps identify the appropriate configuration for the Simplified Loader template to ensure a seamless data exchange with the Oracle Fusion applications. Follow the steps below to locate and store the proper connection setting within the Simplified Loader template:
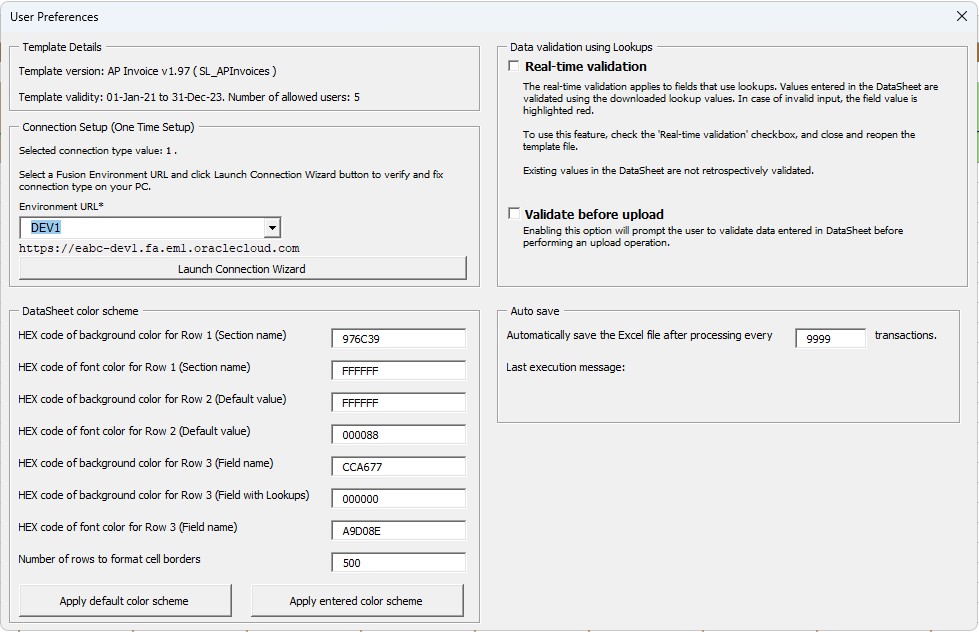
1. Click on User Preferences in the Setup section of the Simplified Loader toolbar to open the User Setup panel

2. In the Connection Setup section of the User Preference panel, select an Oracle Fusion environment from the Environment URL drop-down list and click the Launch Connection Wizard button. This will start the connection wizard to identify the best connection method suited to connect to the selected environment.
3. Review and acknowledge the message.
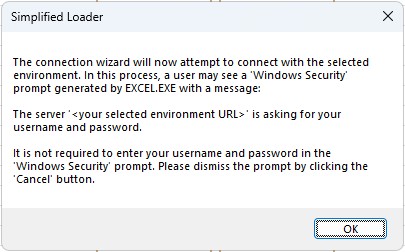
NOTE: To test connectivity, the Connection Wizard will attempt to connect to the selected environment. The test is performed without a username and password, and therefore, it is likely that a pop-up message (screenshot below) will appear asking for a username and password. If this happens, the Template receives a successful response from Fusion. Acknowledge the message by clicking the Cancel button.

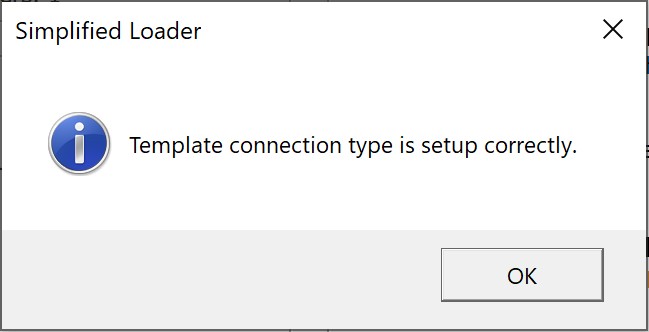
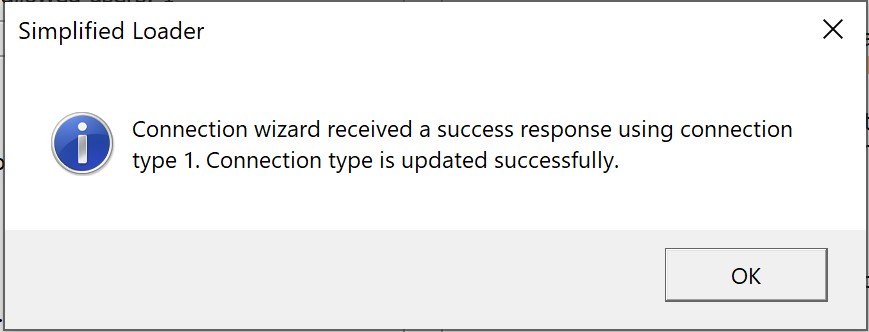
4. When the Connection Wizard finds an appropriate connection type, it displays one of the following messages. Click OK to complete the Connection Setup step.
NOTE: Connection Wizard is required to run only once for each Template by the administrator completing the First Time Setup steps. It is assumed that all machines within an organization follow the same Excel and Windows configuration. To manage exceptions (i.e. users with a different Excel and Windows configuration), the above Connection Wizard steps can be rerun by individual users.
Simplified Loader templates use BI Reports to retrieve data from Oracle Fusion. BI Reports need to be set up once for each template for each environment. Only users that have been allocated the BI Administrator role in Oracle Fusion can complete the BI Report setup.
1. Navigate to Admin Panel.
2. Under the BI Report section, select the environment and enter the Username and login password of the user with BI Administrator Role access.
NOTE: Creating BI reports is only supported using a Fusion username and password. SSO login credentials cannot be used to create the BI report. Contact Simplified Loader Support if the BI Administrator uses SSO credentials to log in to Oracle Fusion.

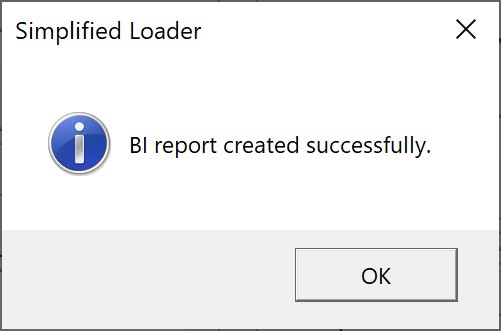
3. Click the “Create the BI report in the selected environment” button to create the BI reports. The following message will appear after the successful creation of the BI reports.
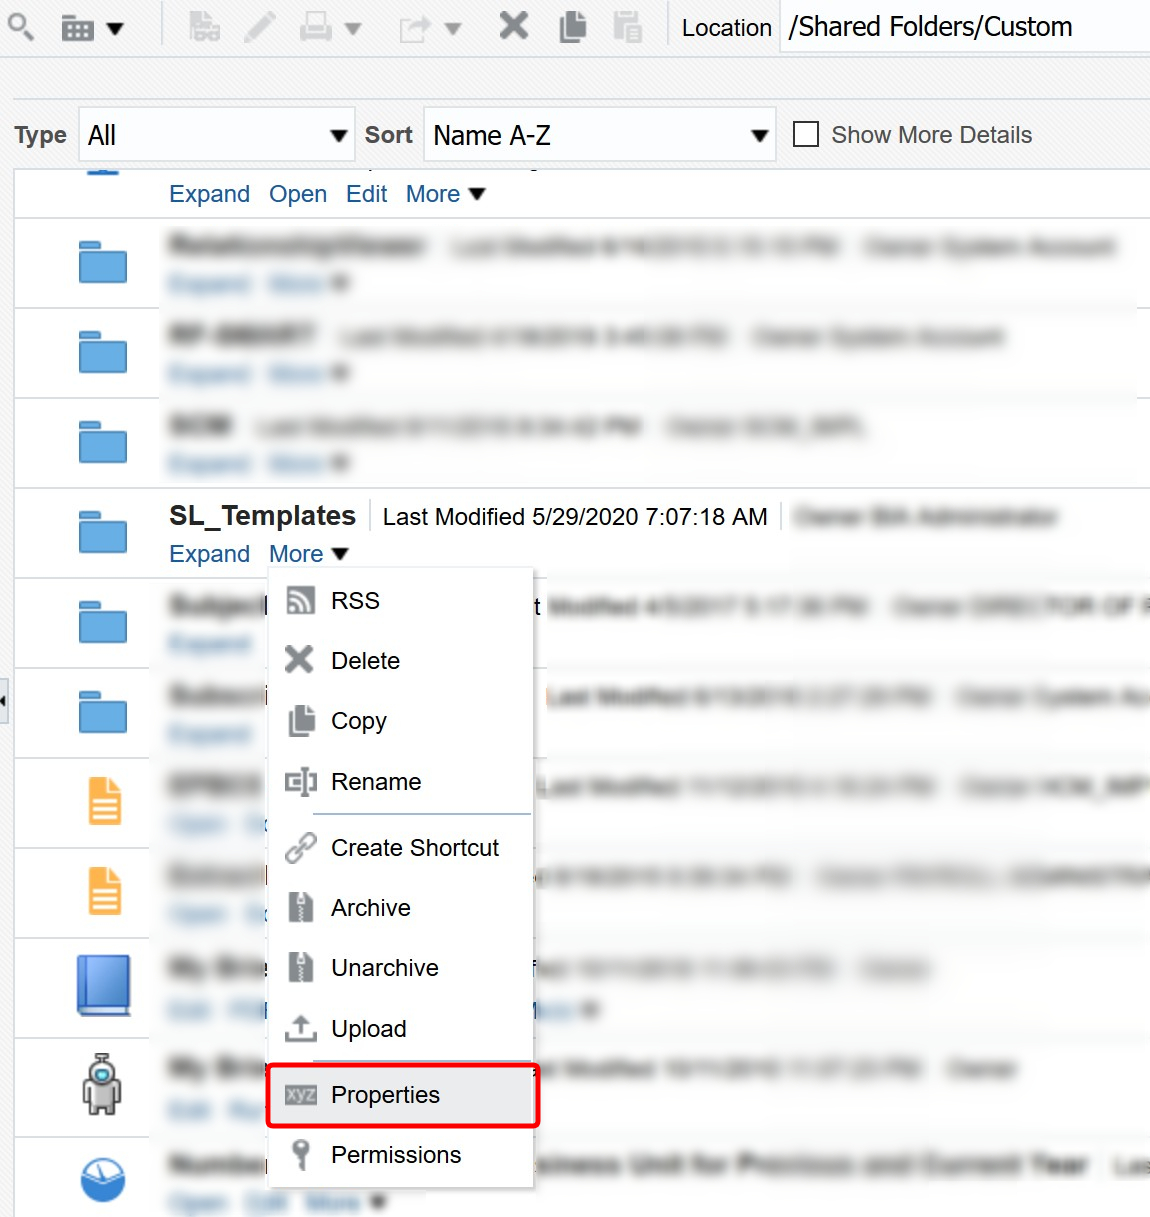
4. After receiving the confirmation message, the BI Administrator can review the reports in the /Custom/SL_Templates folder in Oracle Fusion BI catalog.
5. The BI Administrator can optionally set the SL_Templates folder property to Hidden (shown below). This will ensure that the Simplified Loader reports are not accessed by day to day business users. The business user will not execute the reports directly from BI.

To upload data using the Simplified Loader template, users require specific privileges to be assigned to them in Oracle Fusion. In most instances the seeded roles contains required privileges. This step is required when the seeded roles don’t have specific privilege to the one required by Simplified Loader. Privileges can be assigned to the user using an existing role or a new role. Below are the steps to assign privileges using a new role.
1. Log in to Oracle Fusion with the user having access to the IT Security Manager role.
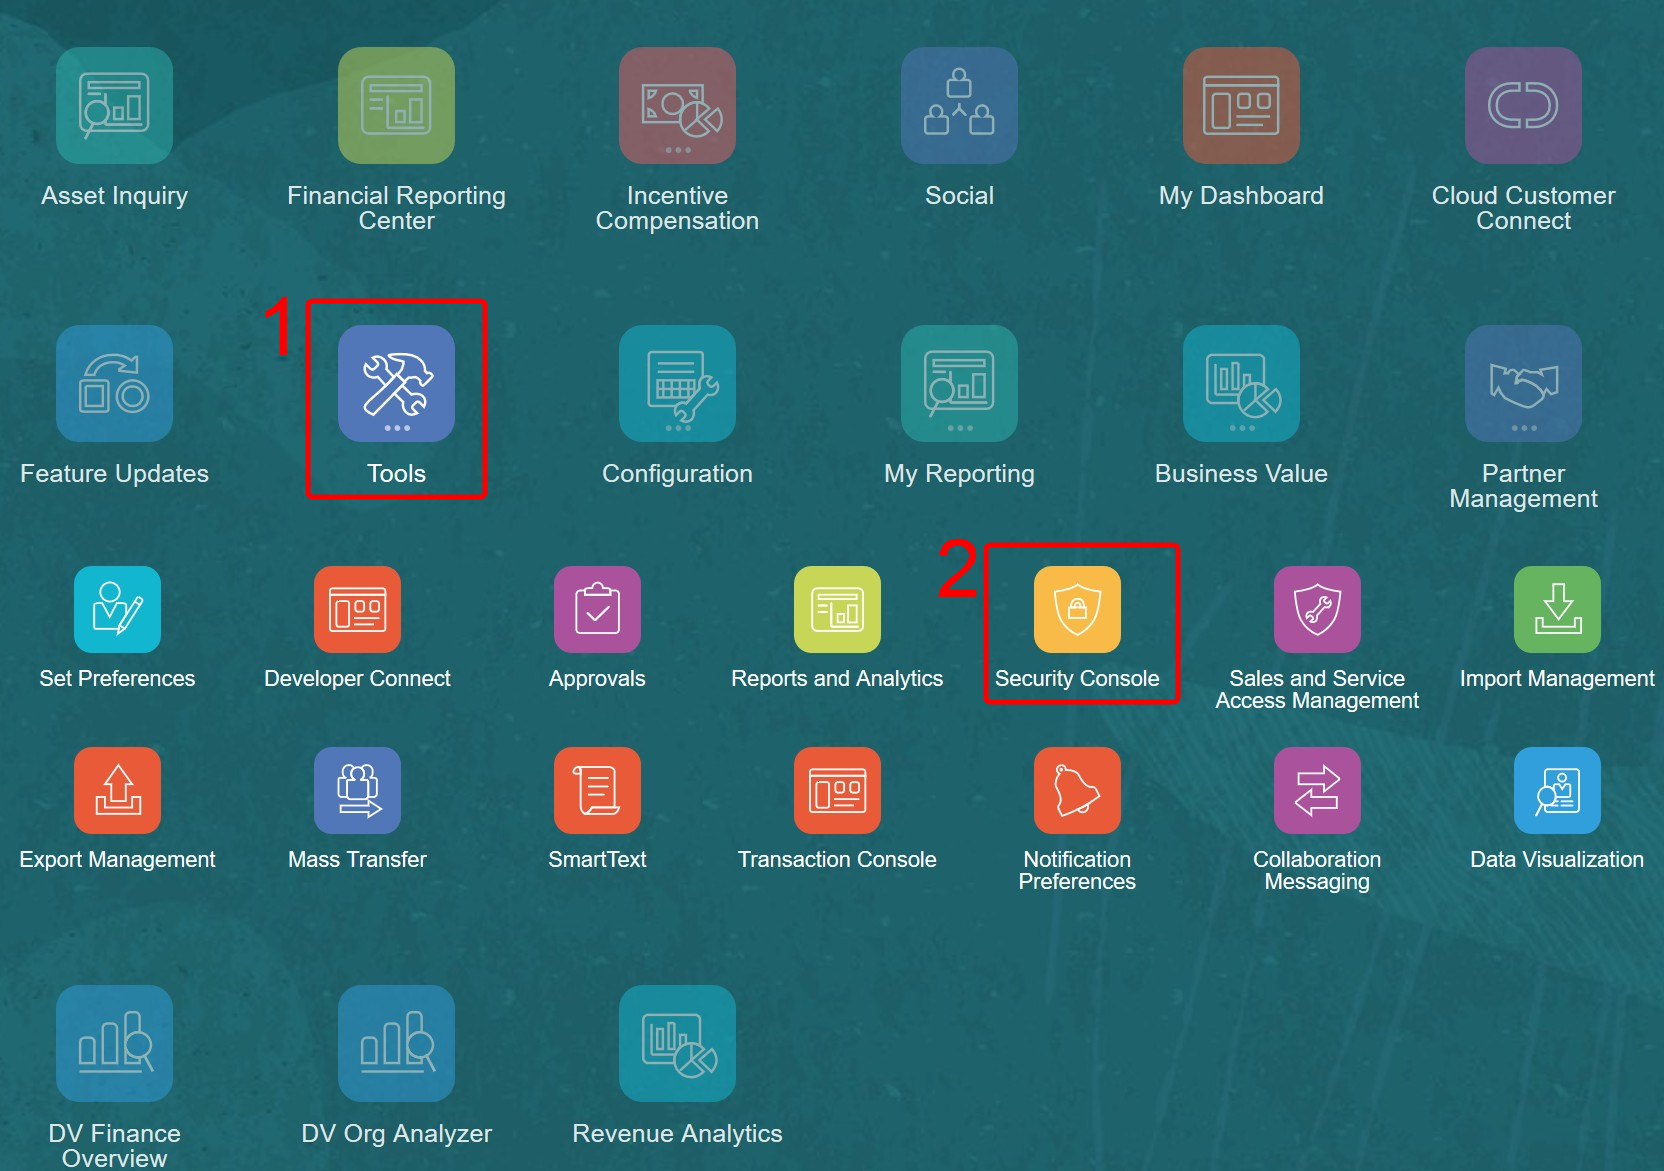
2. From Oracle Fusion’s Springboard. Select Tools and then the Security Console.
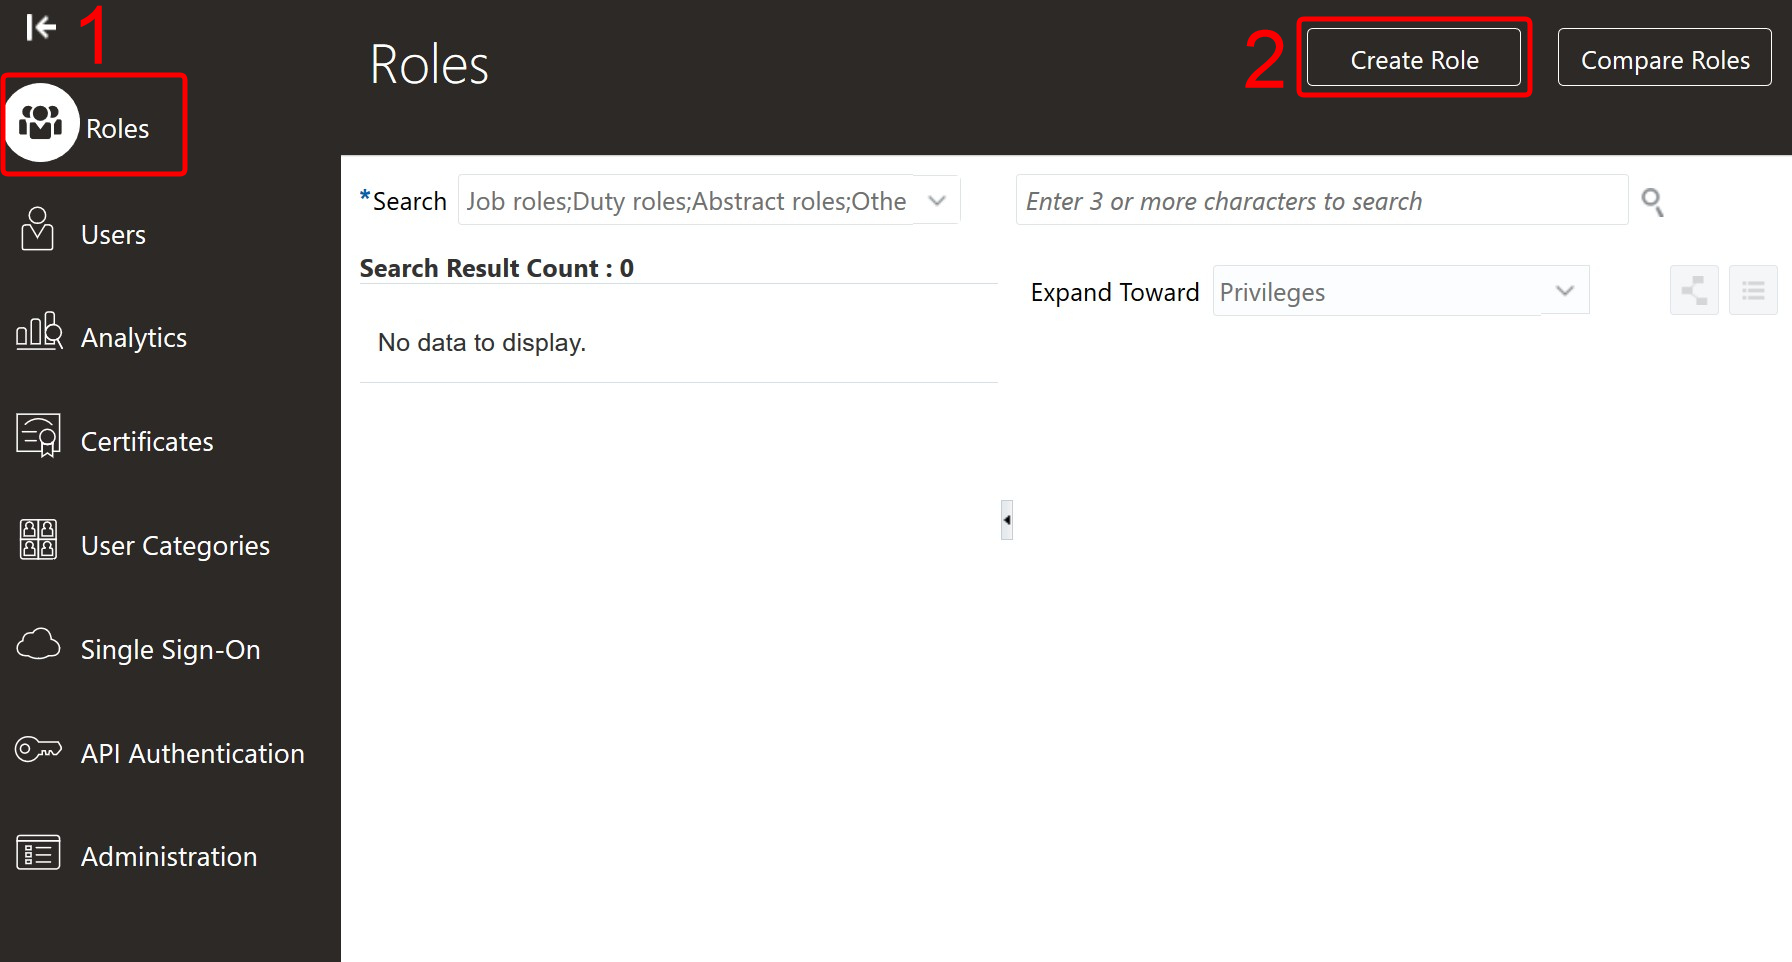
3. In the Roles page, click Create Role.
NOTE: You can add Privileges to a new or existing Role. Based on your organization’s security policies, either create a new Role or use an existing Role to add required privileges.
4. Enter details of the new Role and click Next.

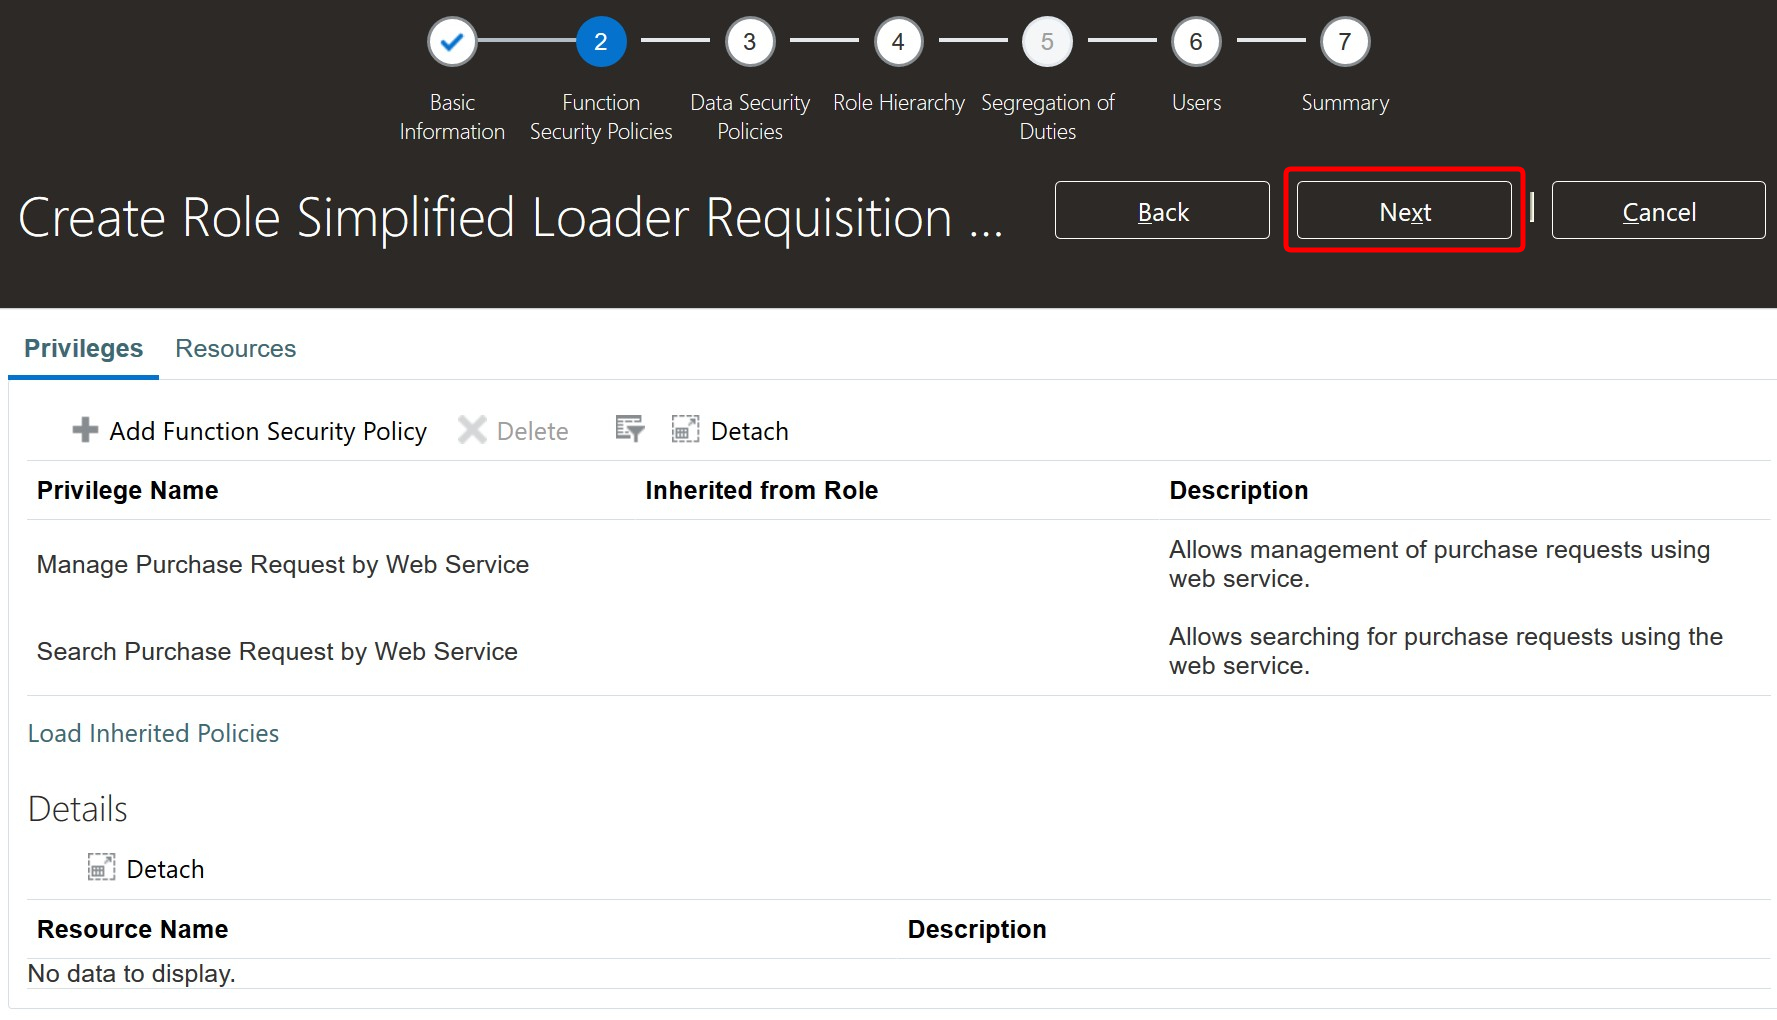
5. In the Function Security Policies page, click Add Function Security Policy.

6. Search for the required privilege, highlight the record and click Add Privilege to Role.
NOTE: Refer to the Template page to get the list of required privileges.

7. Review security Policies in the “Function Security Policies” page and click Next.
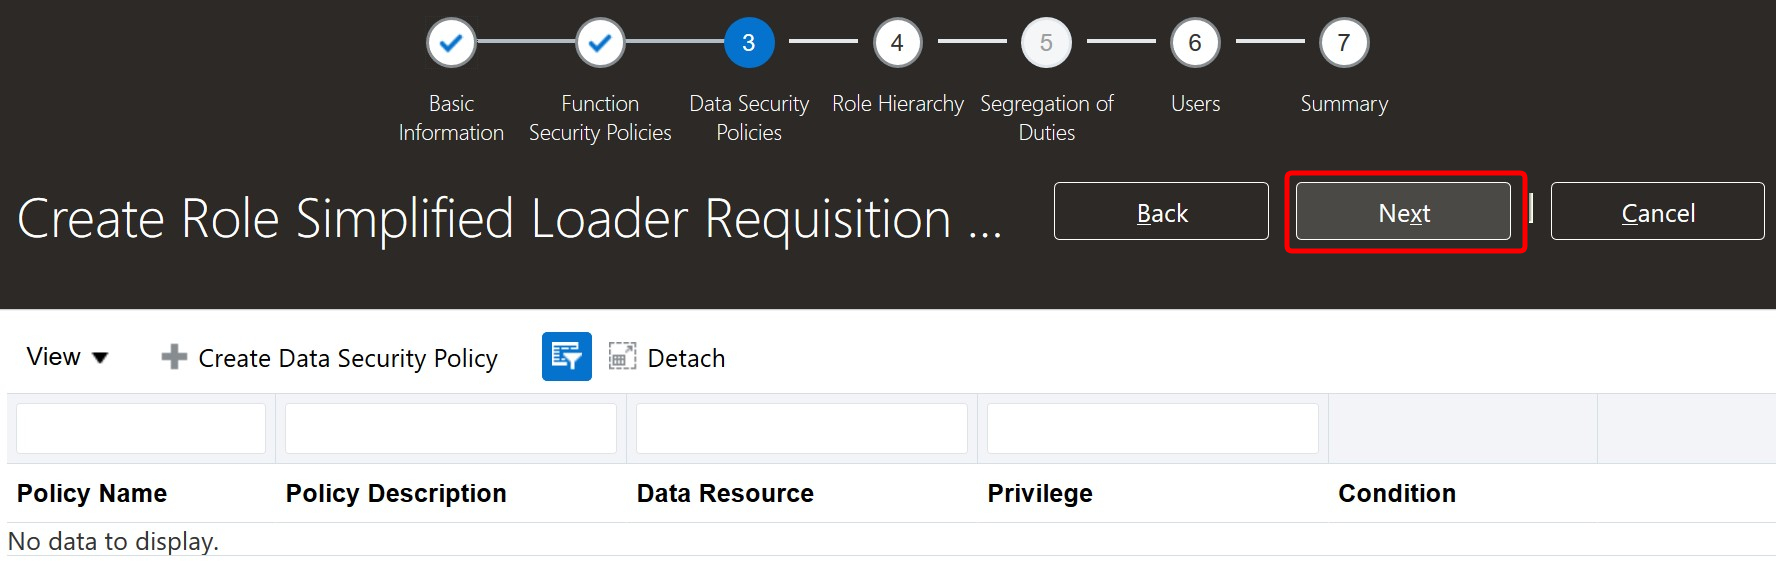
8. On the Data Security Policies page, click Next.
9. In the Role Hierarchy page, click Next.

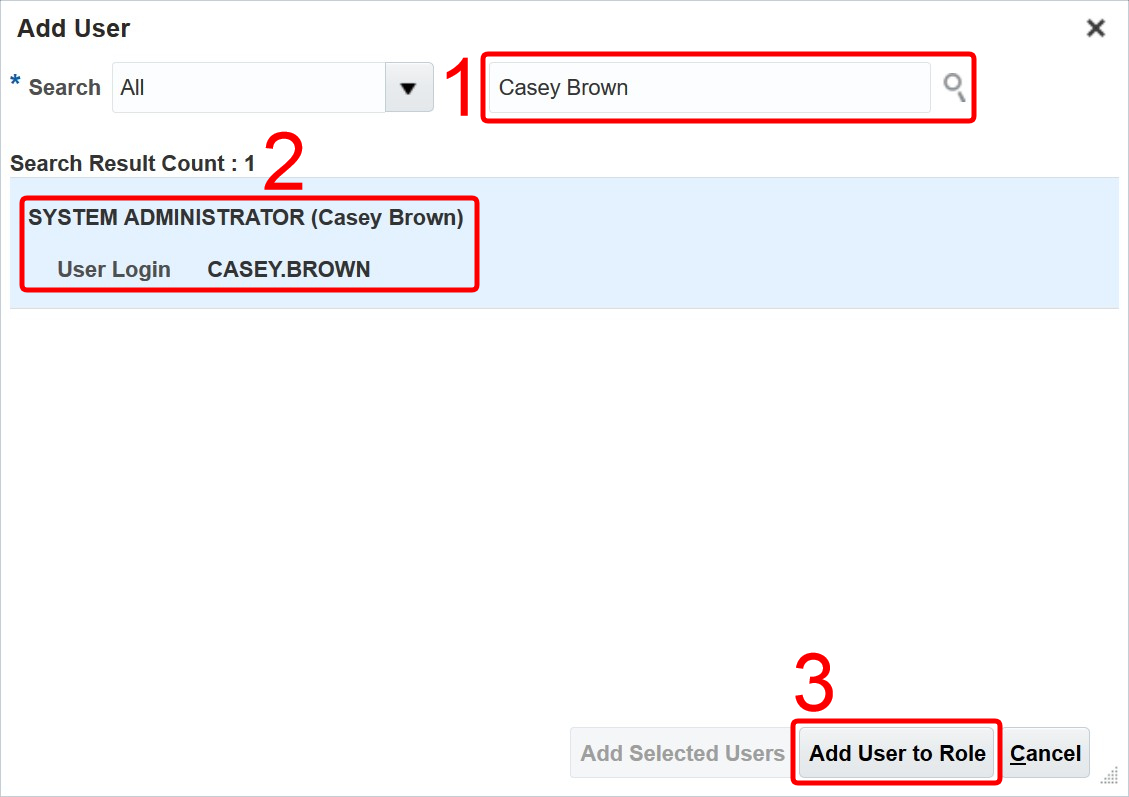
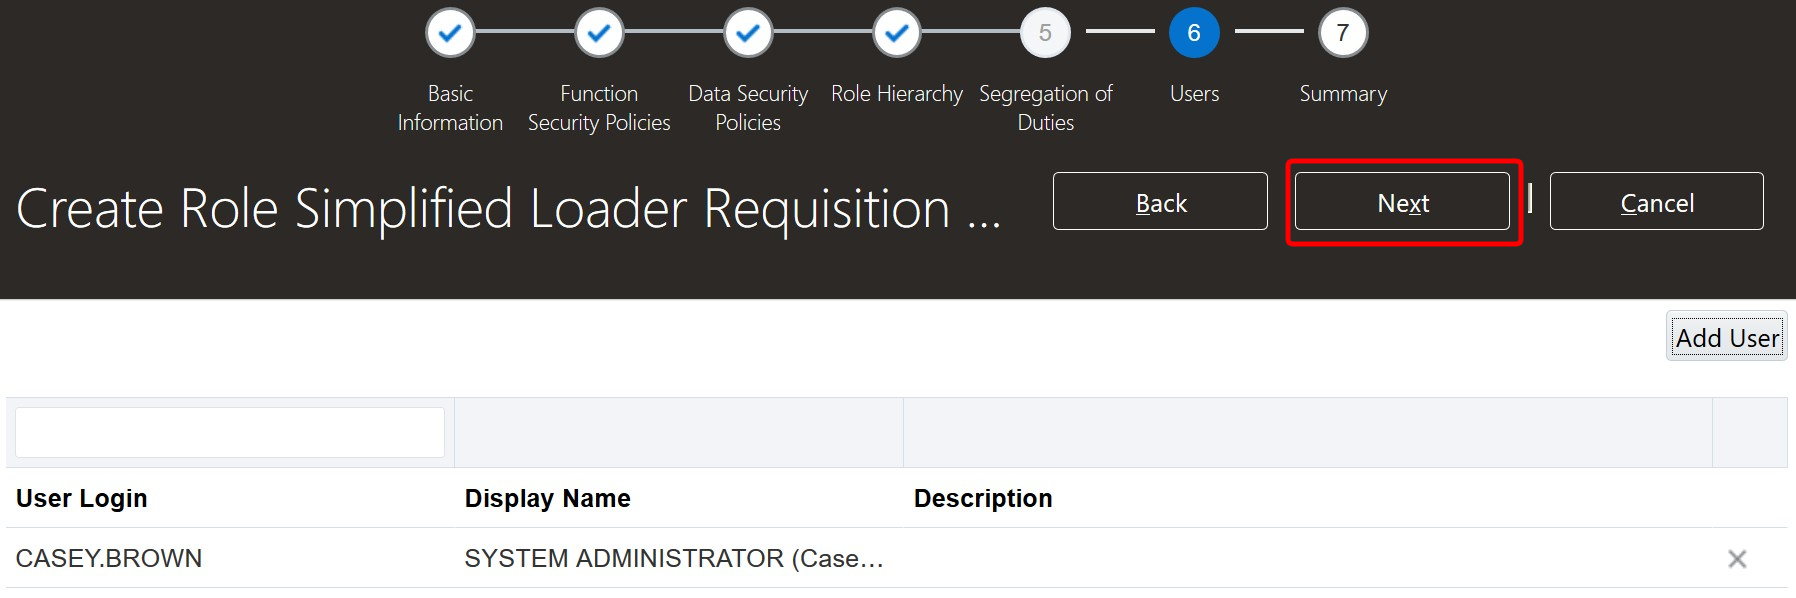
10. Add users to the Role and click Next. Alternatively, Roles can be assigned to the users in the Users page found within the Security Console.

11. Search and add users
12. Review users and click Next
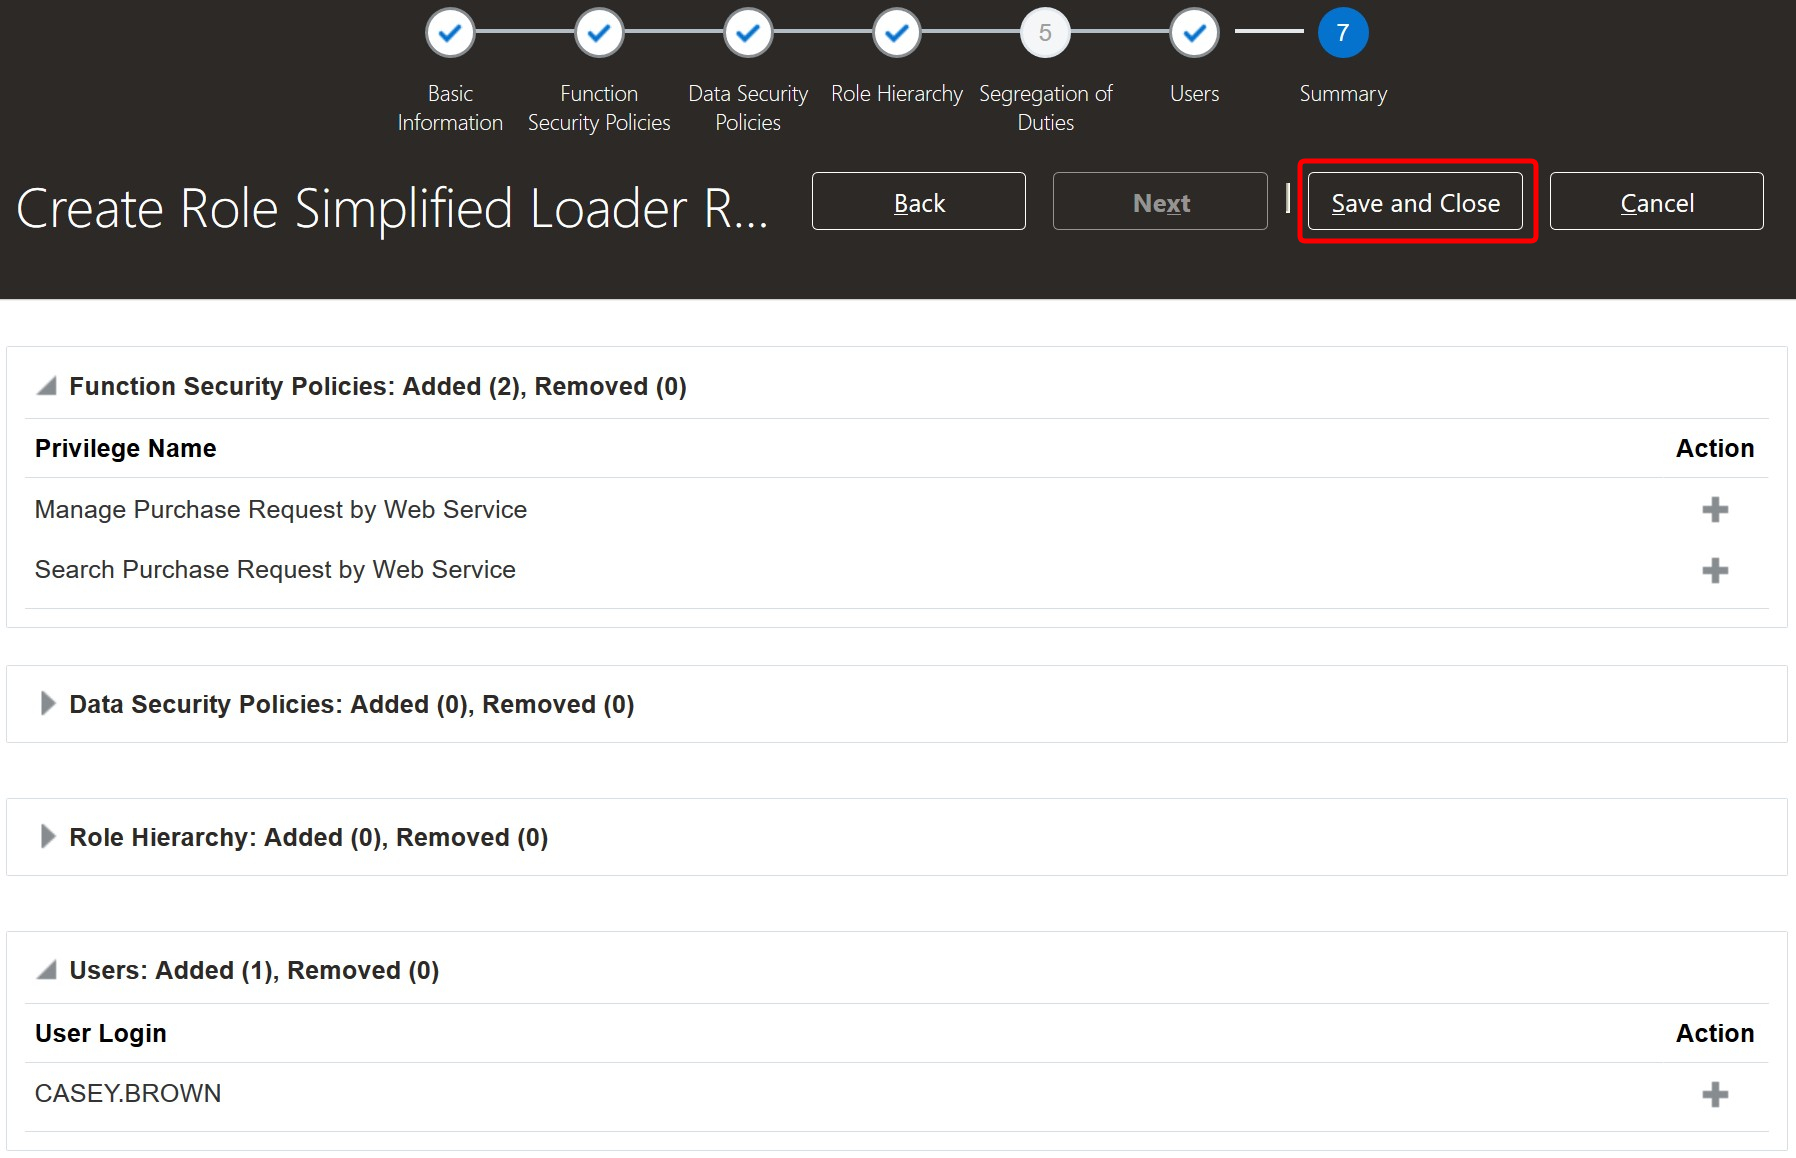
13. In the Summary and Impact Report page, click Save and Close.
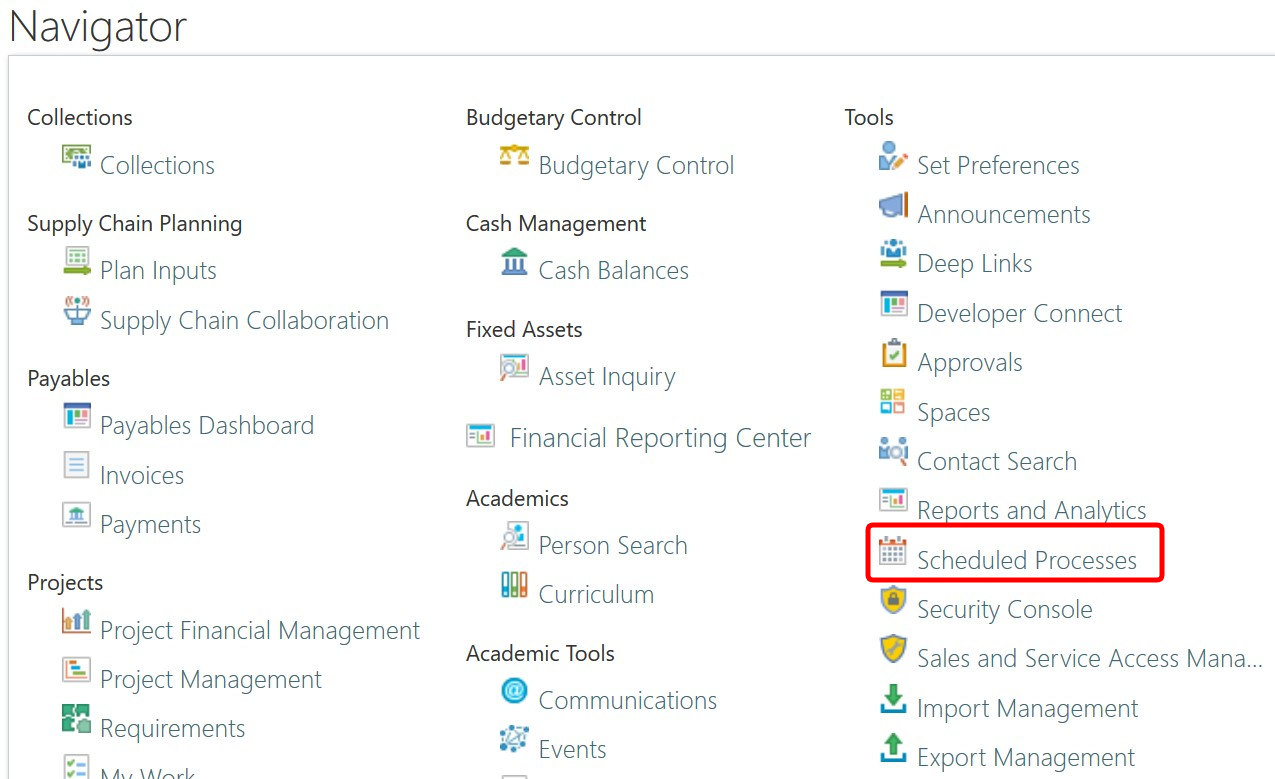
14. From Navigator, select option Scheduled Processes within the Tools section.
15. Execute the following two processes. Please wait for the first process to complete successfully before submitting the next process:
16. After completion of both processes, the user will be able to use the Simplified Loader template.
The user registration for Simplified Loader is administered using Lookup Values. To do so, the System Administrator within your organization needs to define the Template specific Lookup Type in Oracle Fusion to maintain users.
1. Navigate to Admin Panel
2. Get Lookup Type details from the Lookup Type Setup section.

3. Log in to Oracle Fusion and navigate to Setup and Maintenance
4. Select the option “Search” from the Tasks menu
5. Search Task “Manage Common Lookups”
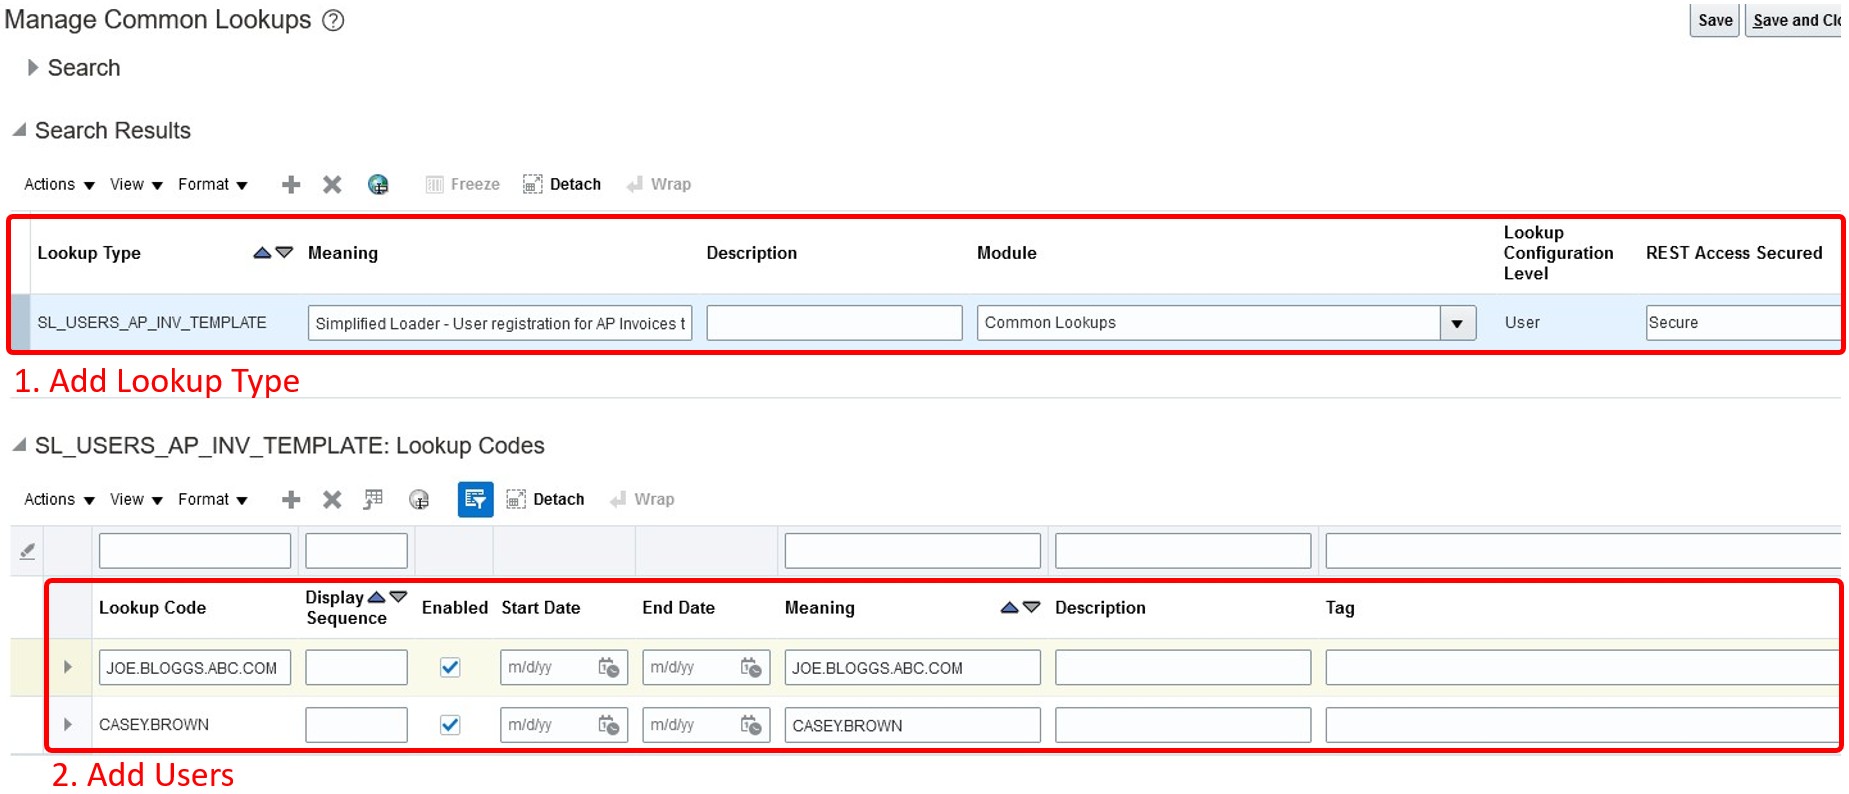
6. Click the Plus (+) icon in the Search section to define a new Lookup
7. Enter the following details:
| Lookup Type | : | {Value obtained from Lookup Type Setup section} |
| Meaning | : | {Value obtained from Lookup Type Setup section} |
| Description | : | Leave blank. This field is used to support custom preferences. |
| Module | : | {Value obtained from Lookup Type Setup section} |
| Lookup Configuration Level | : | {Value obtained from Lookup Type Setup section} |
| REST Access Secured | : | {Value obtained from Lookup Type Setup section} |
8. Save the record
9. Add user names to access the Simplified Loader template in the Lookup Codes section.
| Lookup Code | : | Enter the user name. Example: JOE.BLOGGS@ABC.COM |
| Display Sequence | : | Leave blank |
| Enabled | : | Ticked |
| Start Date | : | Start date from which the user has access. The Start Date field can be left blank. |
| End Date | : | End date to which the user has access. The End Date field can be left blank. |
| Meaning | : | Enter a user name. NOTE: The Template performs user validation using the value in the Meaning field. |
| Description | : | Leave blank. This field is used to support custom validations. |
| Tag | : | Leave blank |
10. Save the record
After completing the above setup steps, the registered user can load data into Oracle Fusion. Every Simplified Loader sheet contains a Sample DataSheet with example transactions. Review the examples to understand the format used to upload data. You will find more information on how to use the Templates in the User Guide.