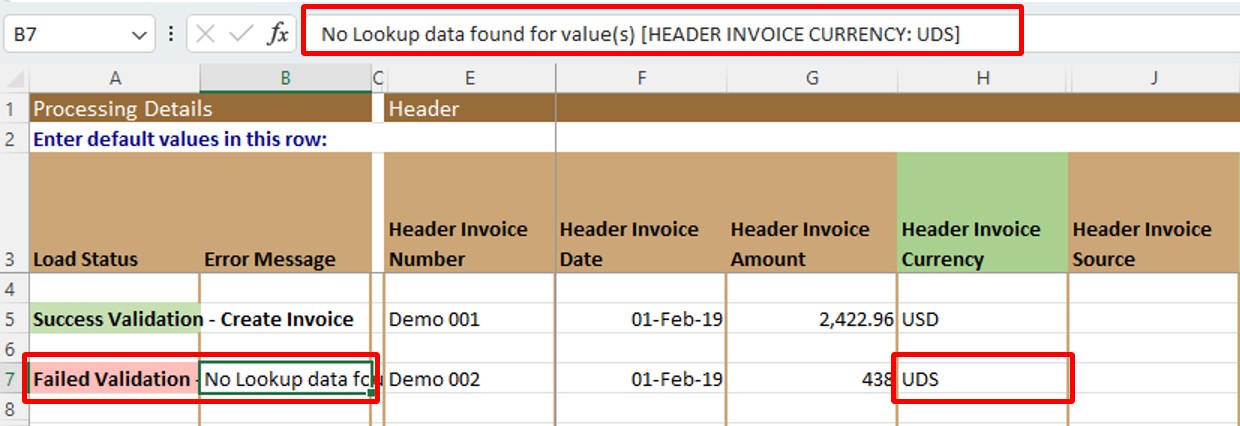
Macro settings & Simplified Loader digital certificate 
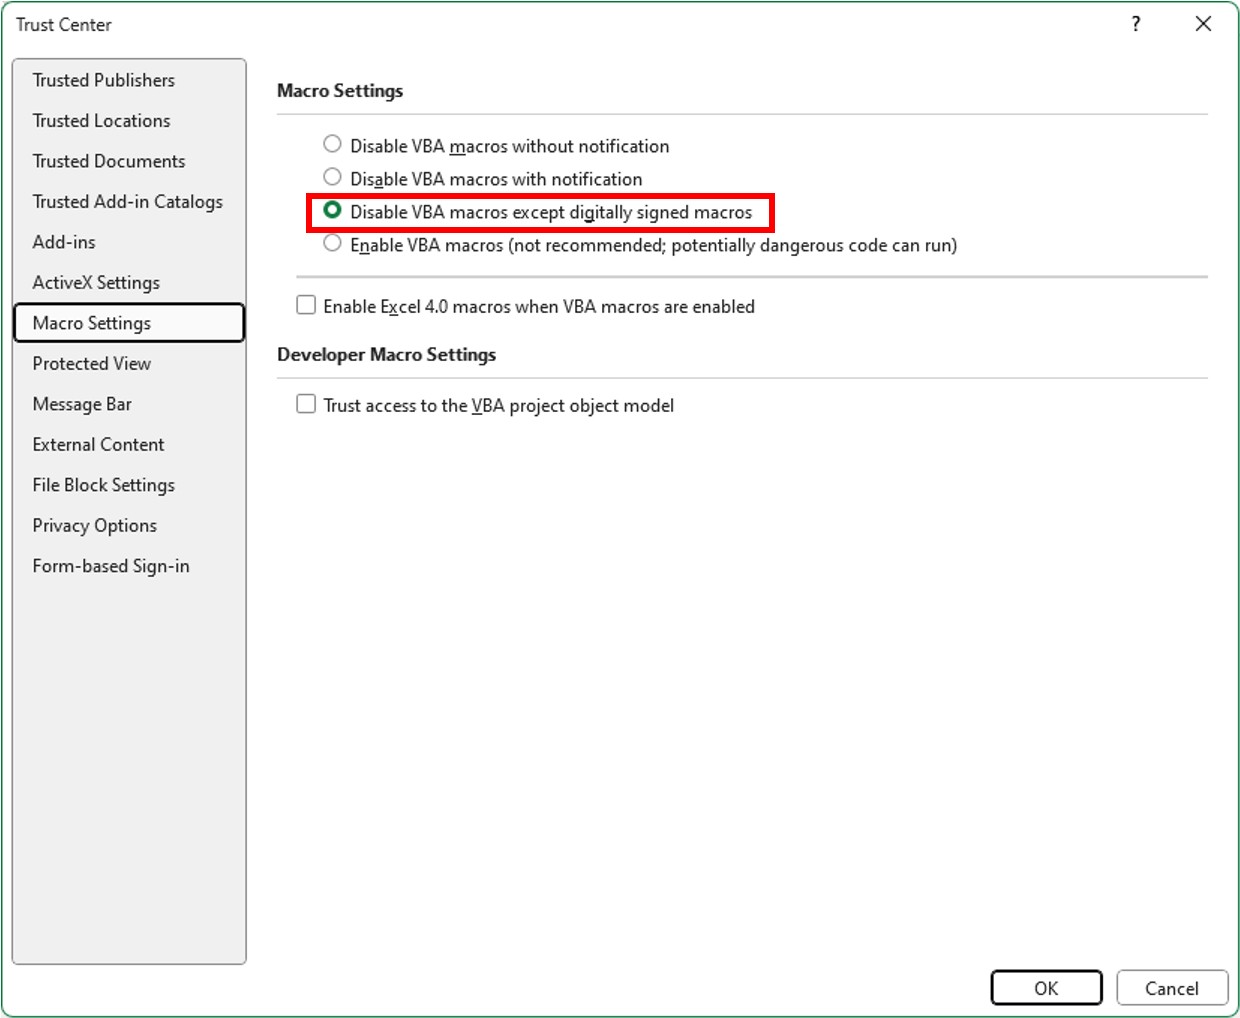
Simplified Loader Excel templates are digitally signed. Simplified Loader recommends setting up the Excel Trust Centre's Macro Settings to "Disable VBA macro except digitally signed macros" and storing the Simplified Loader digital certificate on your computer. Storing digital certificates on the computer is a one-time activity.
Update the Macro Settings to "Disable VBA macro except digitally signed macros"
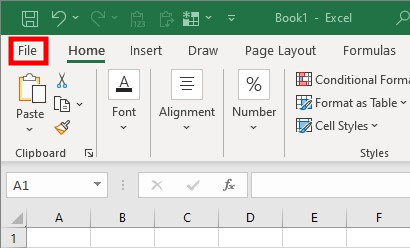
1. Open an Excel file and click the File option in the toolbar
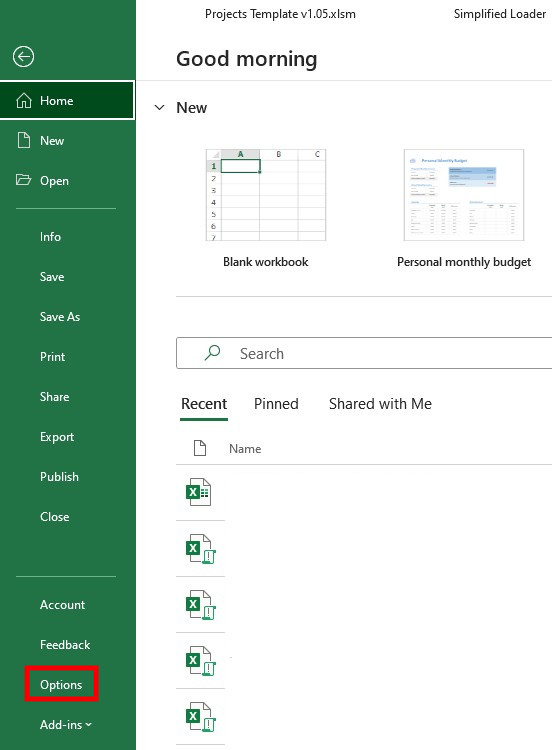
2. Click Options
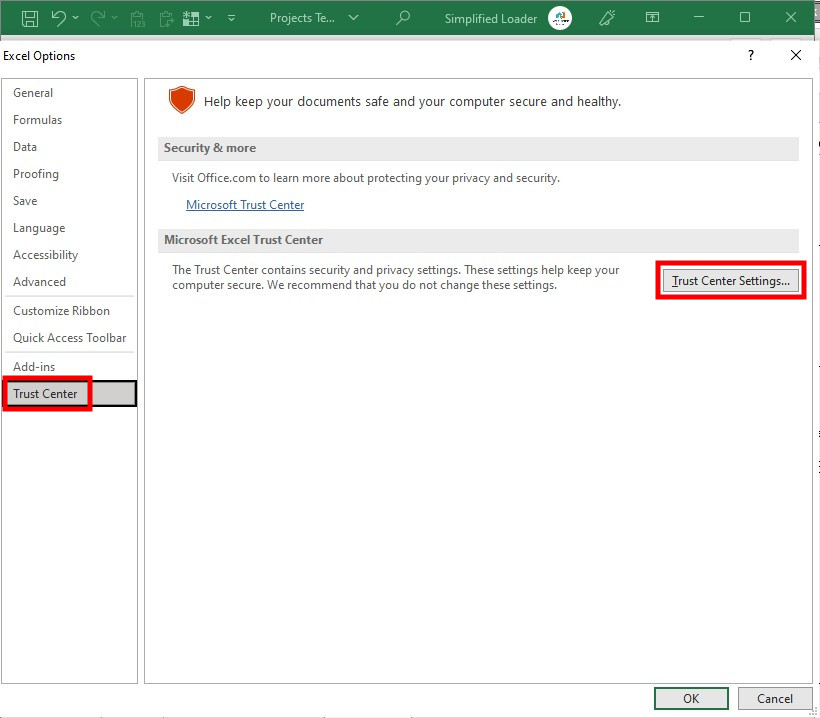
3. Click Trust Center > Trust Center Settings
4. Select the option "Disable VBA macro except digitally signed macros"
Store Simplified Loader digital certificate
1. Log an incident on the Simplified Loader Support Portal to obtain the digital certificate.
2. The Support team will share the digital certificate through the incident. Download the certificate.

3. Unzip the file to get the "Certificate995143510repl_Standard_PEM.cer.crt" file.
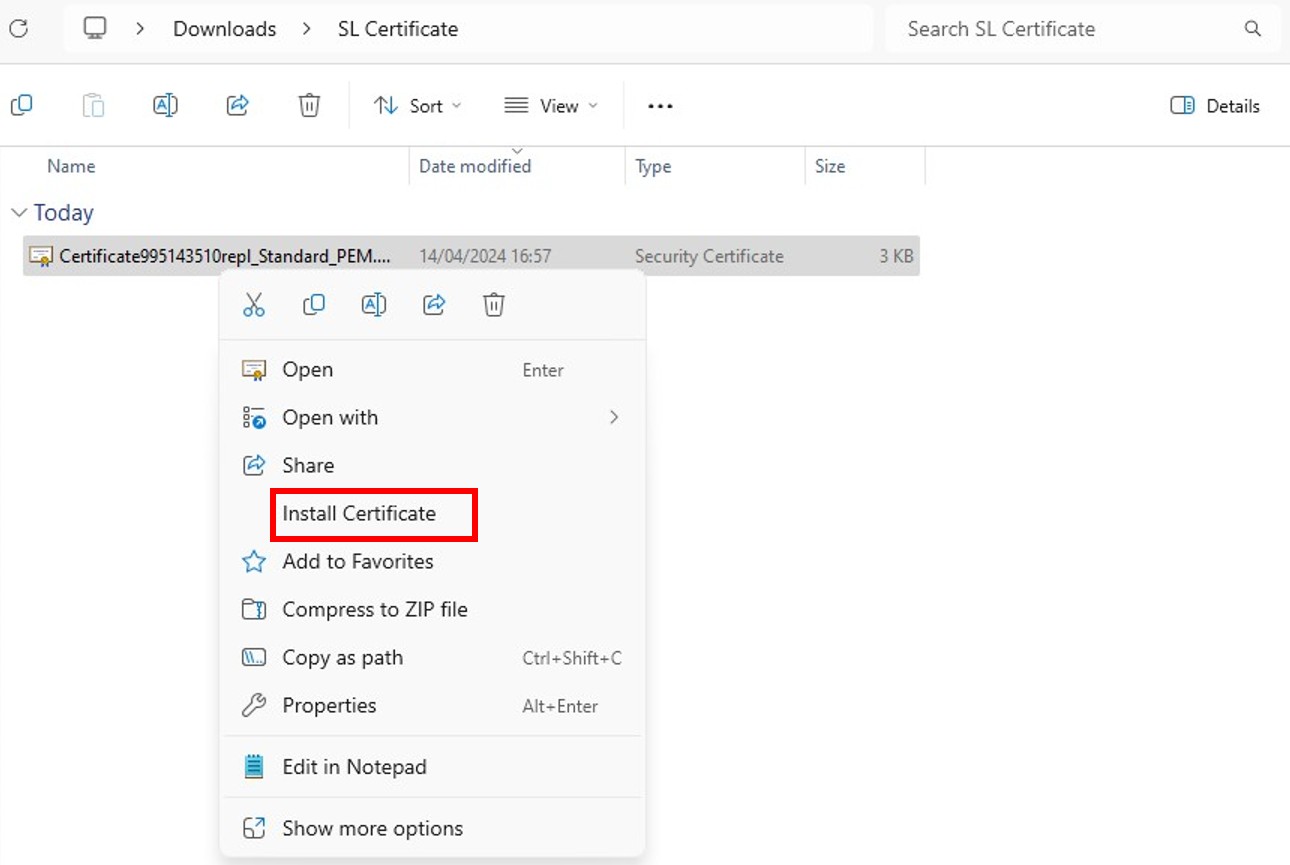
4. To install the certificate, right-click the "Certificate995143510repl_Standard_PEM.cer.crt" file and click the "Install Certificate" option.
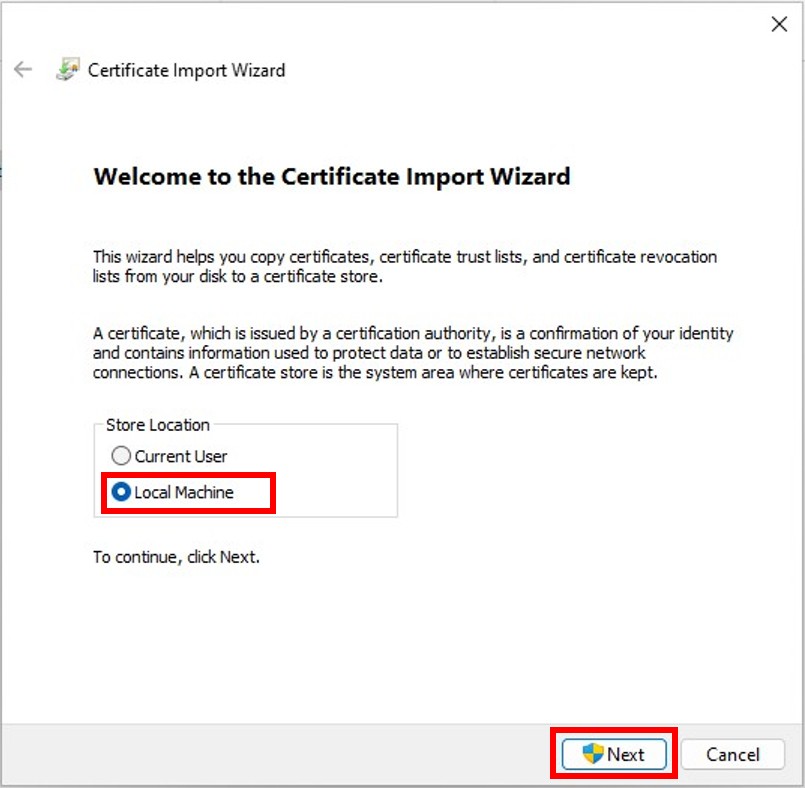
NOTE: The steps documented in this guide demonstrate certificate installation on a local PC as an administrator. Simplified Loader highly recommends distributing the digital certificate using Global Policies. We cannot guide customers on a specific Global Policy distribution structure, as every organization has a particular structure for distributing Global Policies to the user's machine.
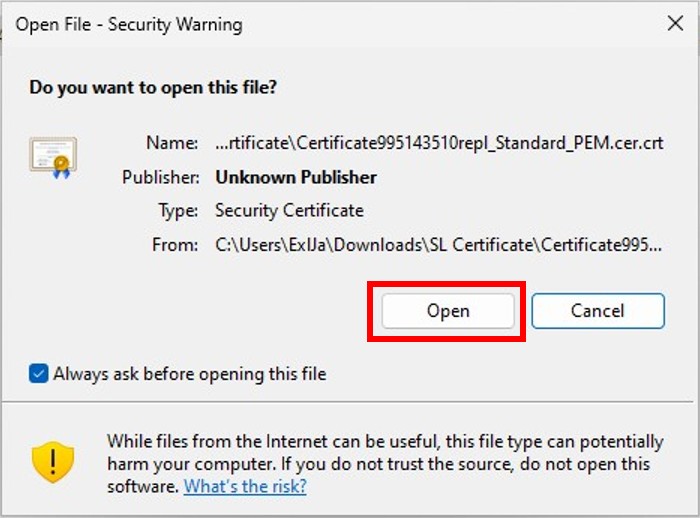
5. Select options as demonstrated in the screenshots below.
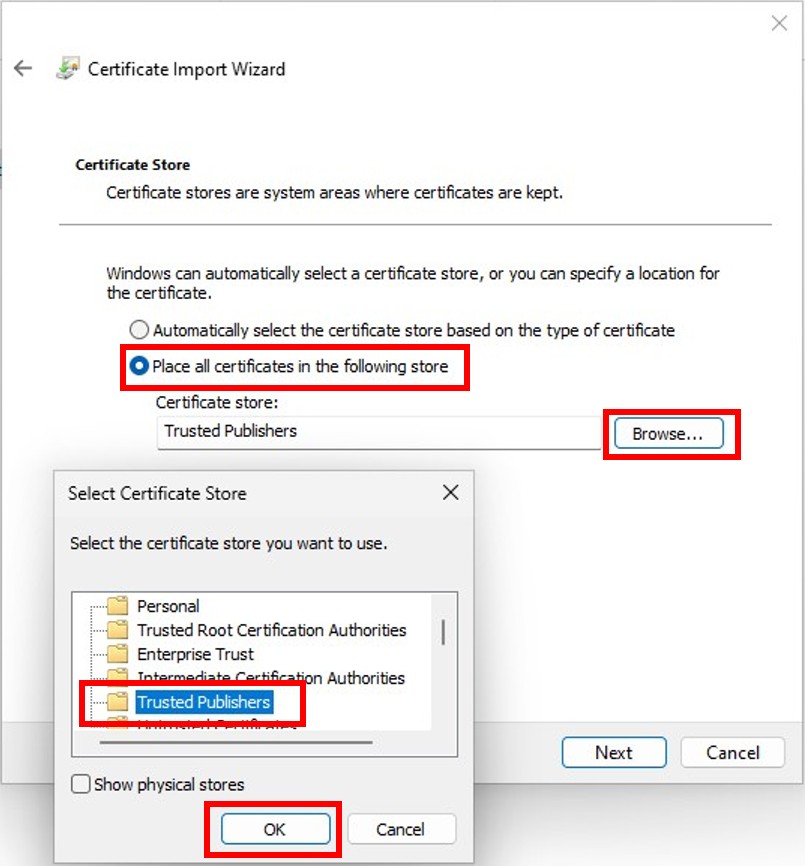
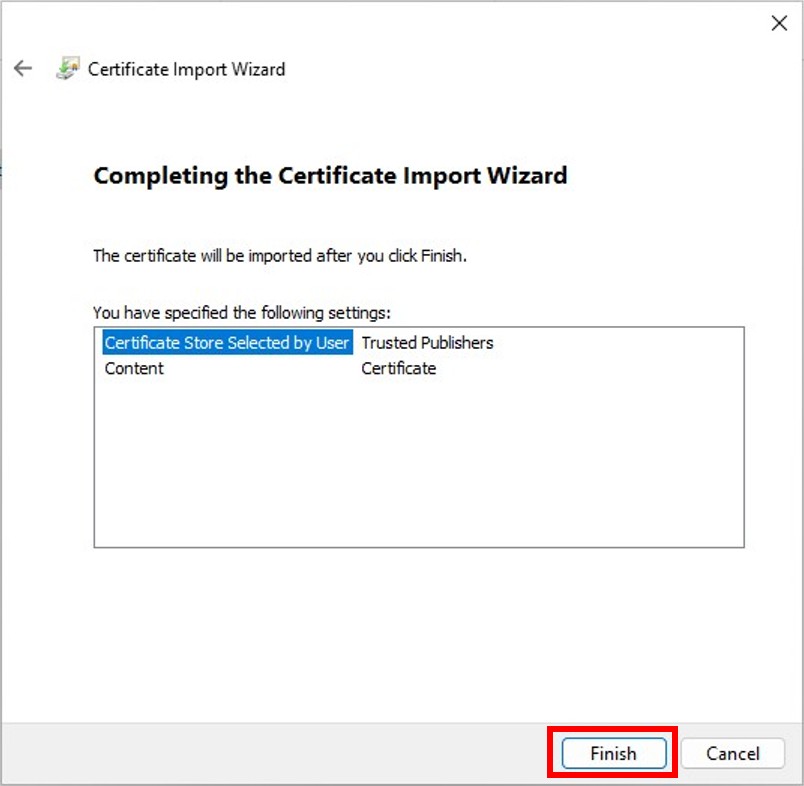
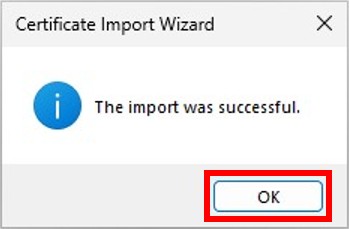
6. This concludes the certificate installation on the user's PC. When performing the step using Global Policies, please ensure to update the policies (using the gpupdate command) on the user's machine.
Review stored Simplified Loader digital certificate
1. Navigate to Windows's Control Panel and search "Manage Certificate".
2. Under "Windows Tools", select "Manage computer certificates".

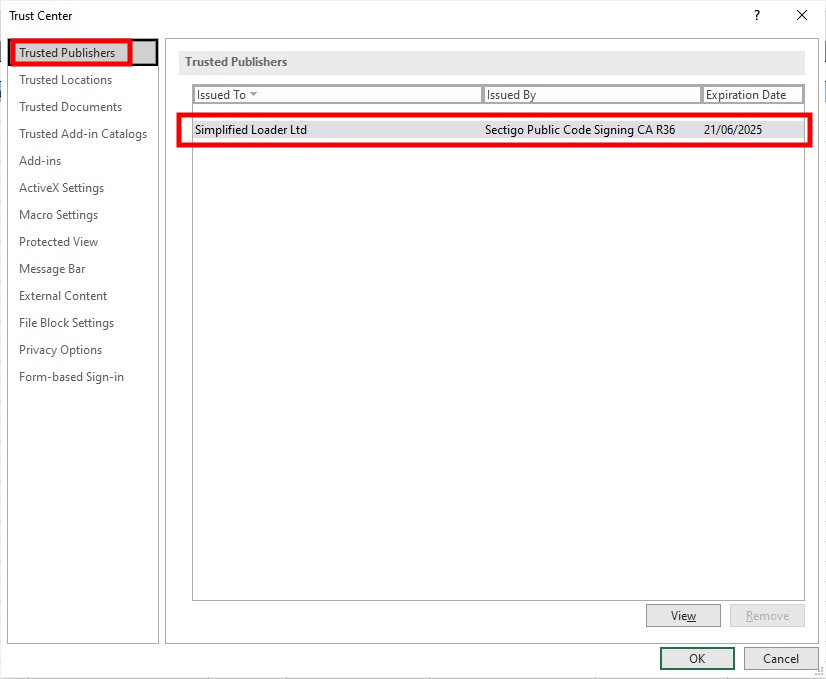
3. The Simplified Loader certificate will be displayed under the Trusted Publisher > Certificates.

4. Two certificates from Sectigo will be displayed under the Intermediate Certification Authorities > Certificates.

5. The "AAA Certificate Services" will be displayed under the Trusted Root Certification Authorities > Certificates.

6. Open any Excel file and click the File option in the toolbar

7. Click Options

8. Click Trust Center > Trust Center Settings

9. Click Trusted Publishers to view all trusted publishers
Macro Security Risk 
When downloading a Simplified Loader Excel template from the internet, Windows often blocks the Excel macros from executing. This prevents all Simplified Loader operations from executing. Upon opening a file with blocked macros, the user will see a security risk message.

Follow the steps below to resolve the security risk message:
1. If the file is open, close it first.
2. Locate the file in File Explorer, right-click on it, and select 'Properties'.

3. In the 'Properties' window, under the 'General' tab, look for the checkbox labeled 'Unblock'. Check the 'Unblock' box, then click 'OK'.

4. Open the file. The red security risk message will disappear. Instead, a security warning highlighted in yellow will appear. Click 'Enable Content'.

5. Save the file. The macro warning will be turned off, and the user can now use the Simplified Loader operations in the Excel template.
Simplified Loader Toolbar 
Every Template contains a Simplified Loader Toolbar.

The Toolbar is divided into four sections Log In, Operations, Lookups, and Setup. All but the Operations section are identical in each Template.

Log In enables a Simplified Loader user to log in or out from the Oracle Fusion.
Operations contain actions that are specific to the Template. Detailed descriptions of these operations can be accessed from the Template page.
Lookups section of the Toolbar is used to refresh the Lookup values in the template.
Setup contains the operations that enable users to connect to Oracle Fusion environments, choose validation options and perform admin tasks.
Worksheets 
All Simplified Loader Templates contain three worksheets: About, DataSheet, and Sample - DataSheet.

This section describes the general purpose and features of these sheets.
About Worksheet
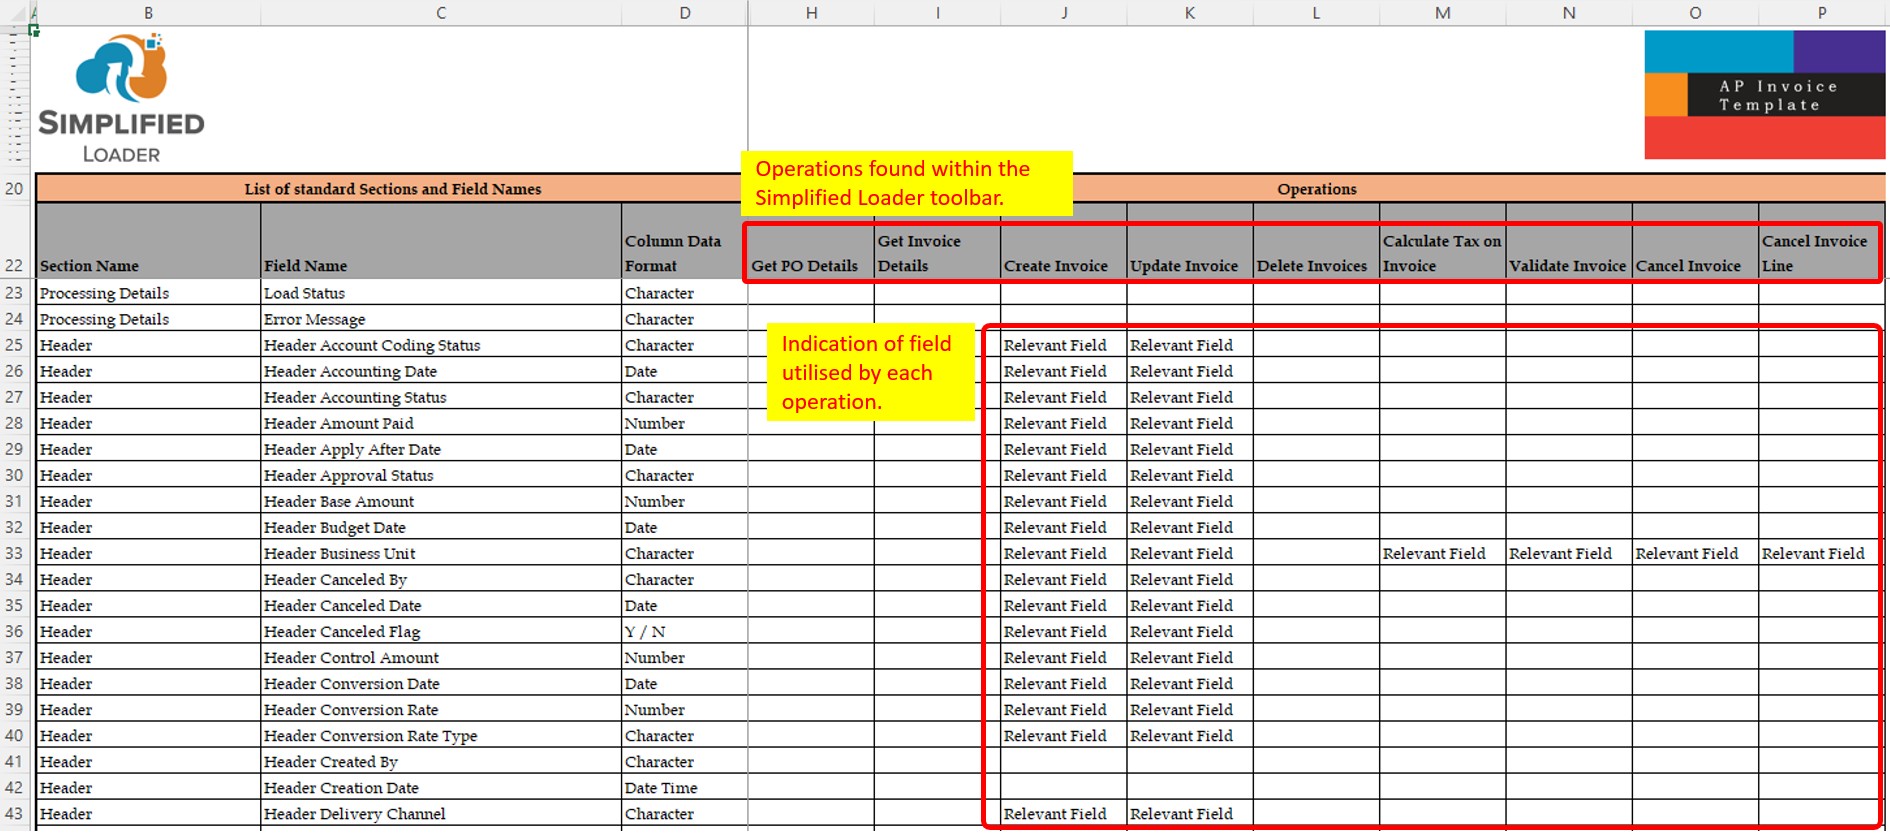
The About worksheet contains the master list of data fields available to use in the DataSheet. All data fields have an associated field description.
These data fields are derived from the relevant Oracle web service. For example, all 270 data fields provided by the Oracle Payable Invoice Web Service are within the Simplified Loader Payables Invoice template. Each data field in the About sheet is uniquely named.
The About worksheet sets out the data fields utilized by all the operations that can be carried out within that Template. Not all data fields are used by each operation. Where an operation utilizes a field, this is indicated by the "Relevant Field" value.
DataSheet
The DataSheet is the area in the Simplified Loader Template where the user completes operations and data is exchanged with Oracle Fusion. It is, therefore, the principal working area for the user.
The titles of some of the columns in the Data Sheet are highlighted in green. This indicates that the data entered in these columns are validated against an associated List of Values (LOV) found within the Lookups Sheet.

Each operation in the Operations section of the Simplified Loader Toolbar utilizes specific data fields. These data fields are identified in the About worksheet by the term 'Relevant Field' in the column representing the specific operation.
Sample – DataSheet
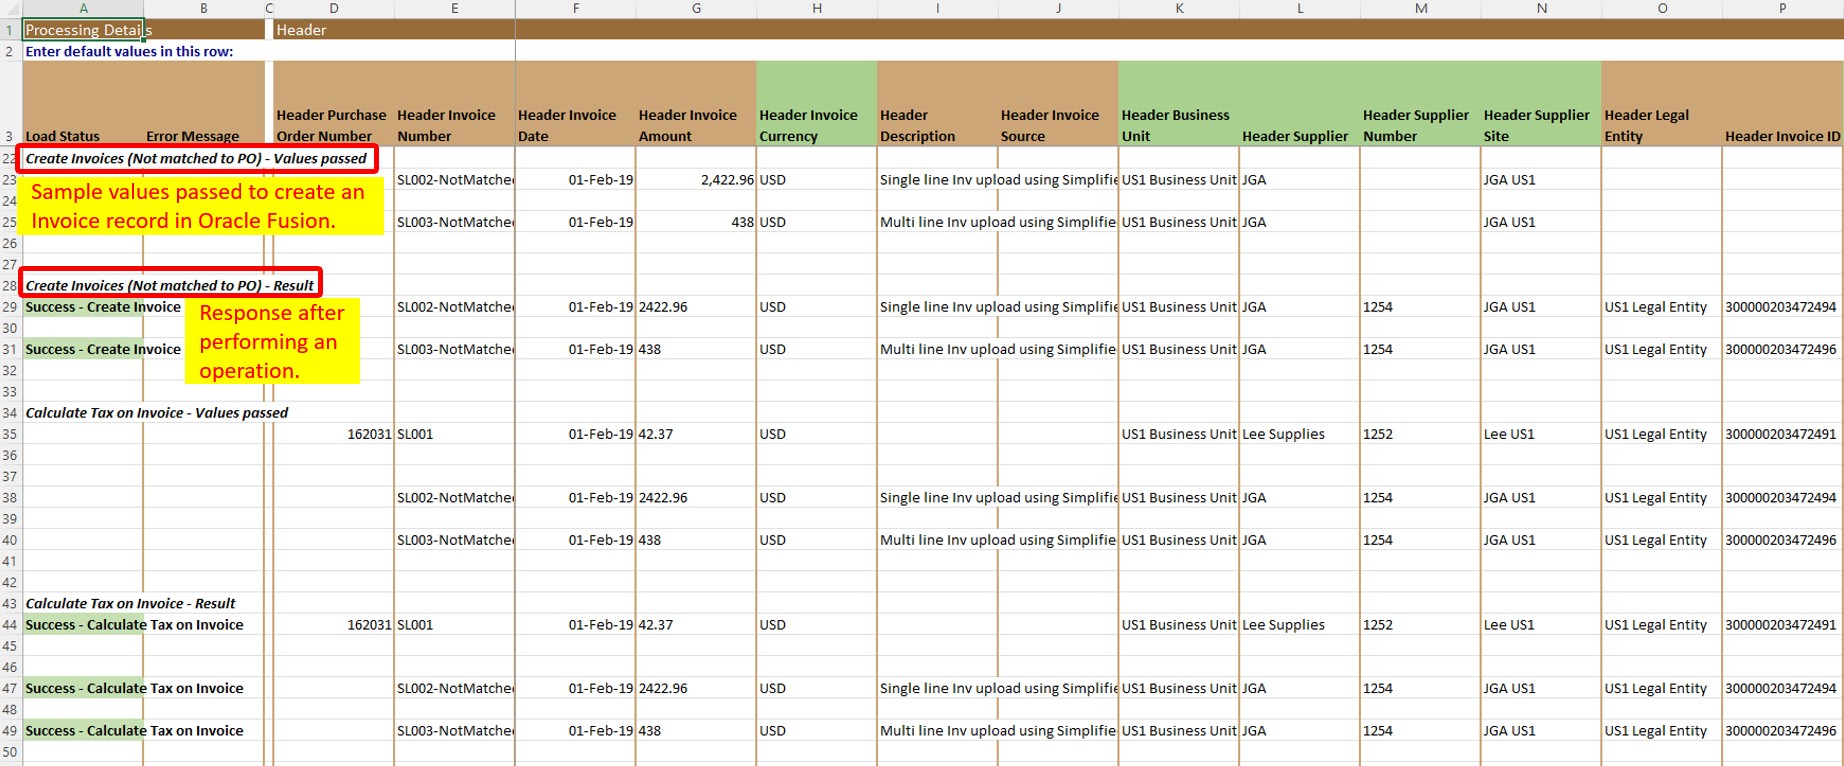
Users can find examples in the Sample – DataSheet worksheet of how data should be entered for each operation ('Input values') in the Operations section of the Simplified Loader Toolbar. There are also examples of how the data is returned as a result of executing an operation (Result).
The Sample – DataSheet worksheet can be deleted when the user no longer needs it.
Log In / Log Out
A user needs to log in whenever they perform an operation that requires data exchange with Oracle Fusion. The user can choose to sign in using the Log In section of the Simplified Loader Toolbar. Alternatively, the Log In window will appear whenever the user performs an operation requiring a connection to Oracle Fusion.
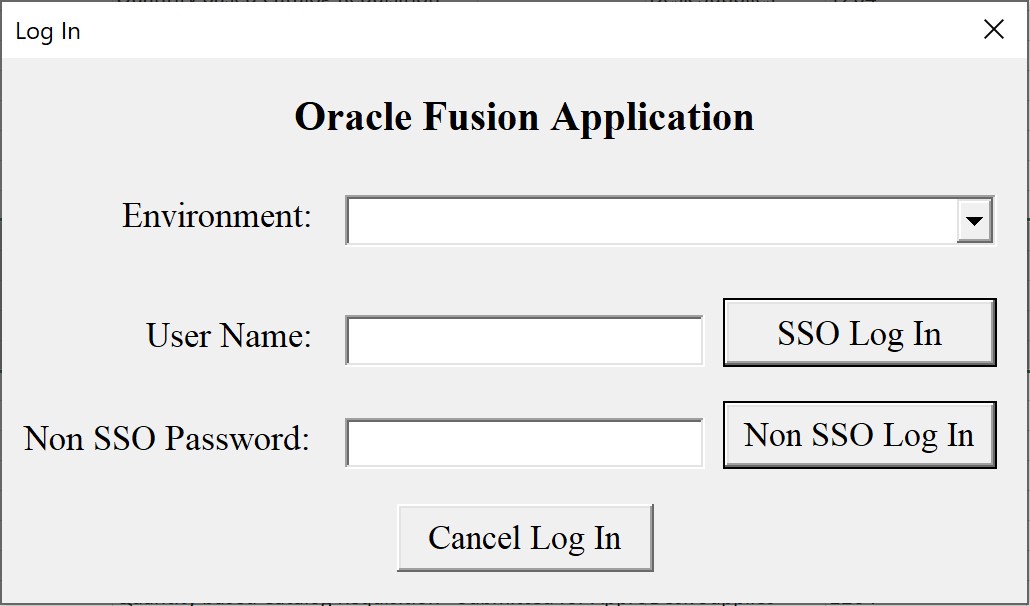
1. Select the environment to log in to and enter the User Name.
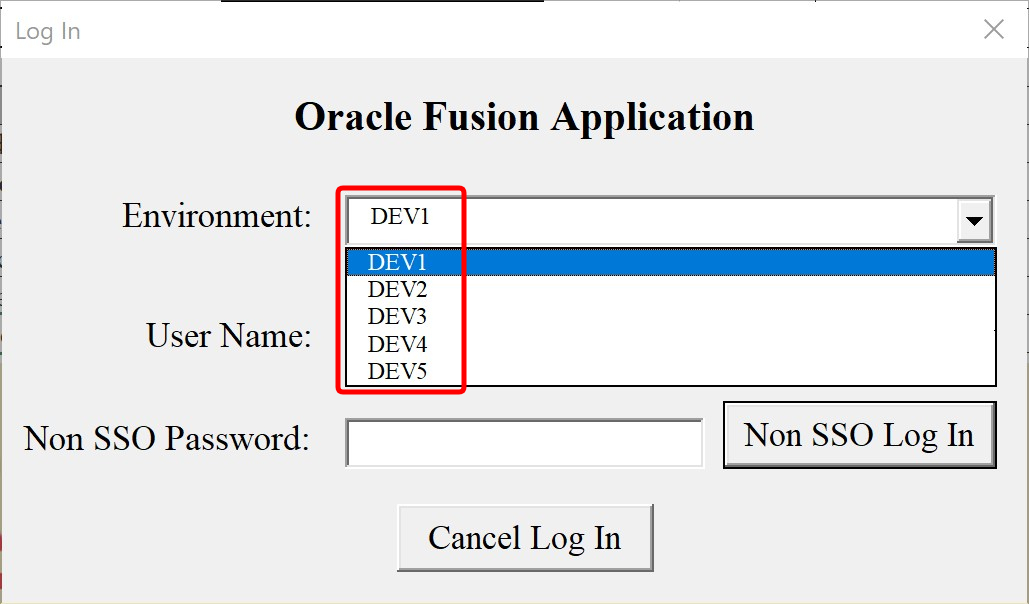
2. The Log In window remembers the last used Environment and User Name.
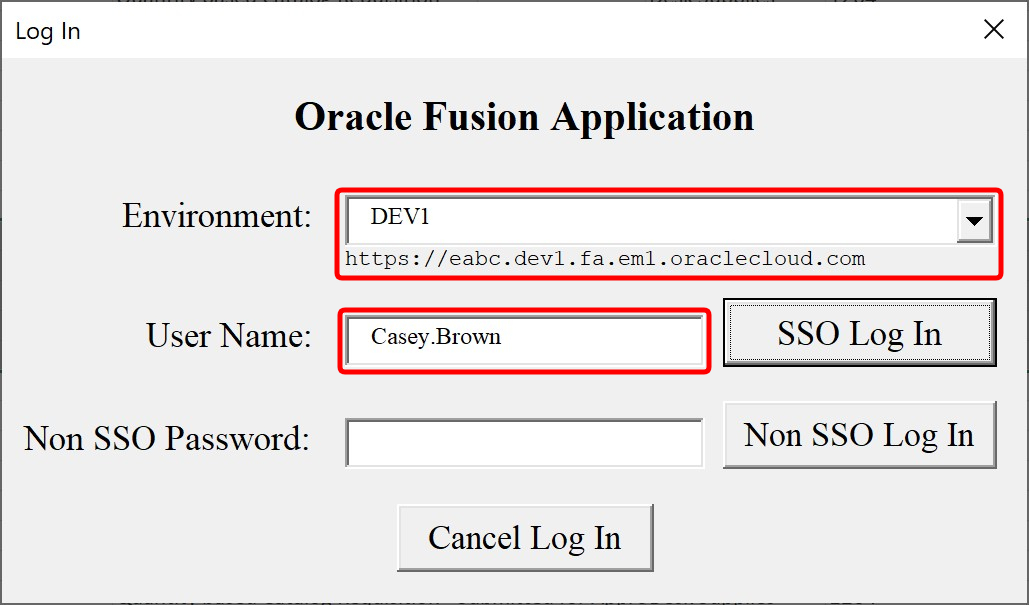
3. The next step is to choose to log in using SSO (Single Sign-On) or Non SSO (Oracle Fusion stand-alone login).
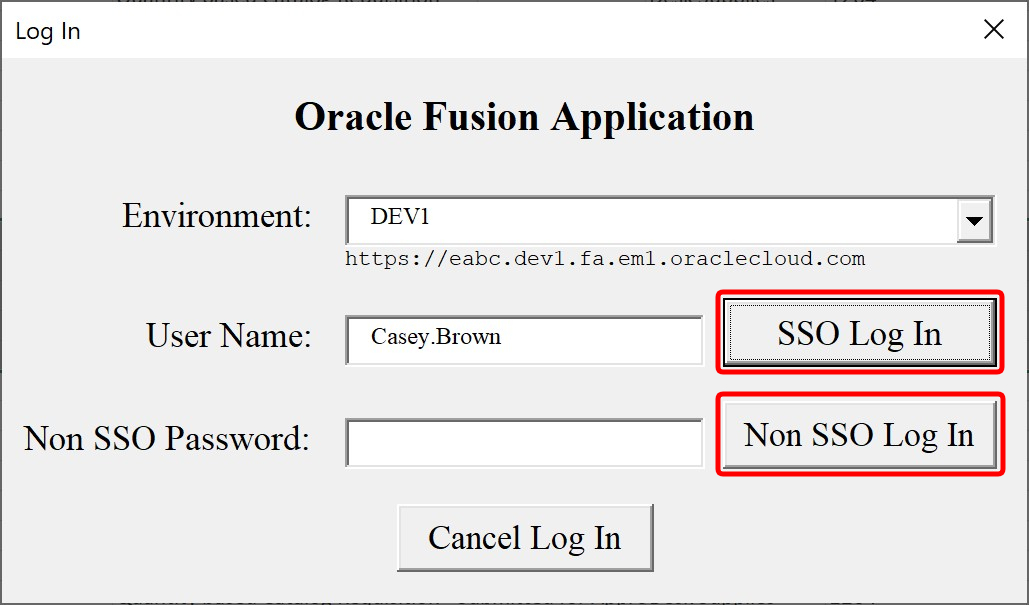
SSO Login
SSO login procedure is followed when the user is presented with his or her company's specific Single Sign On (SSO) method to log in.
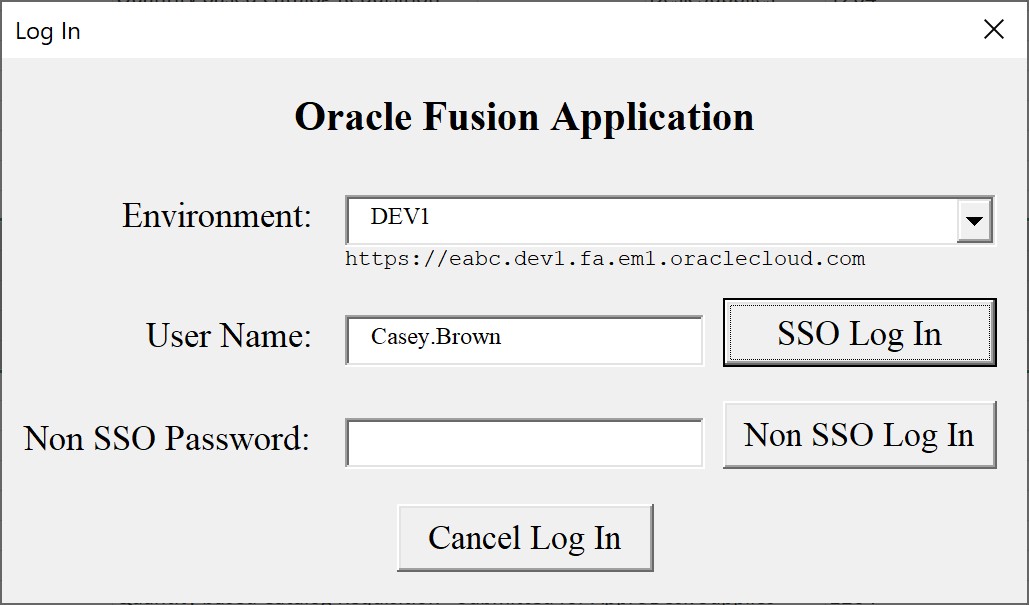
1. To log in using SSO, the user needs to click the SSO Log In button, leaving the Password fields blank.
2. Excel will launch a browser window that will take you to the Log In window used in your organization. The following is a sample screenshot of the Microsoft SSO login screen. This screenshot may differ from what you see based on your company's SSO configuration.
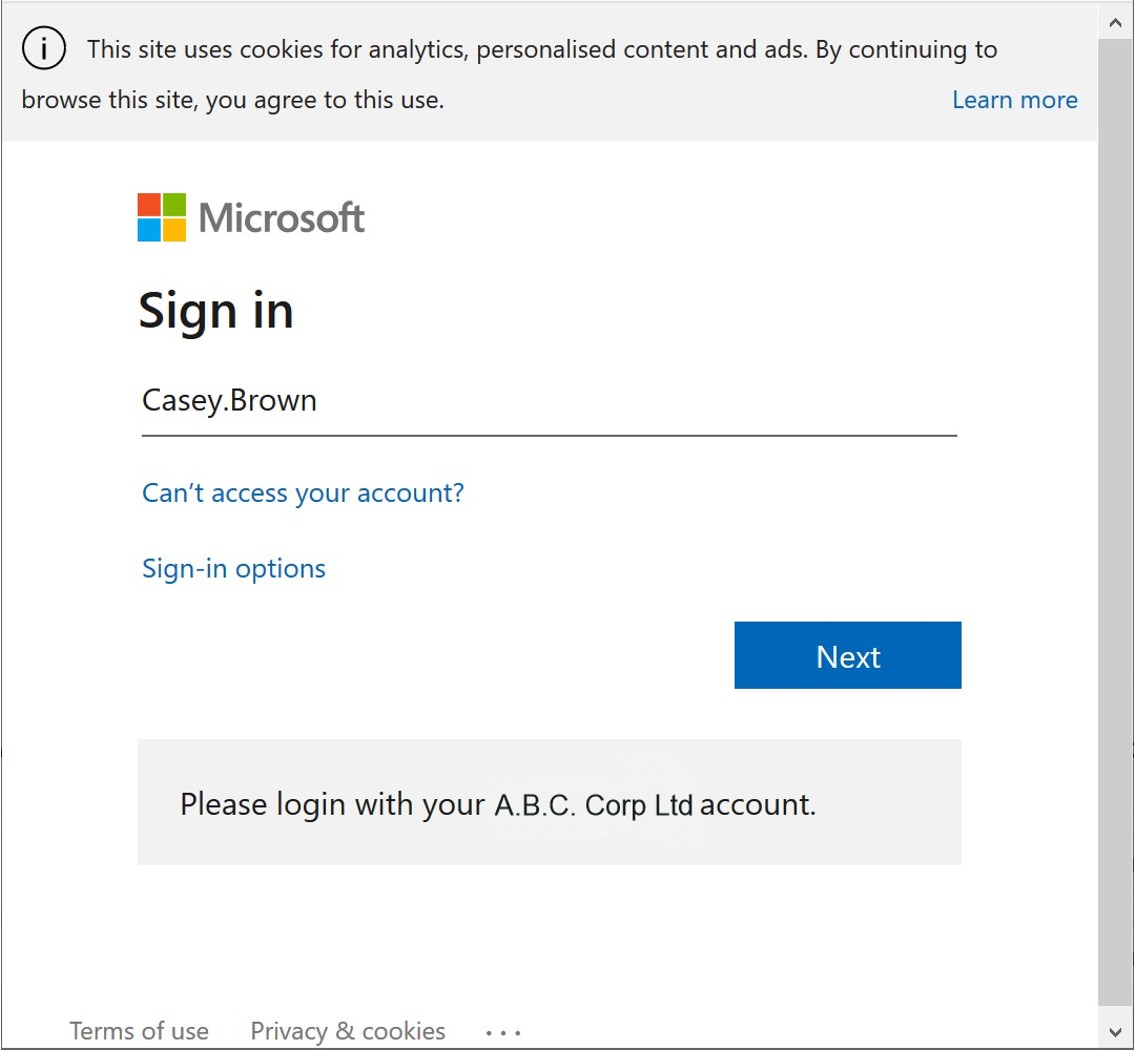
3. Complete your company's SSO verification steps.
4. After the SSO validation, the browser window will close automatically.
5. The user is now logged in.
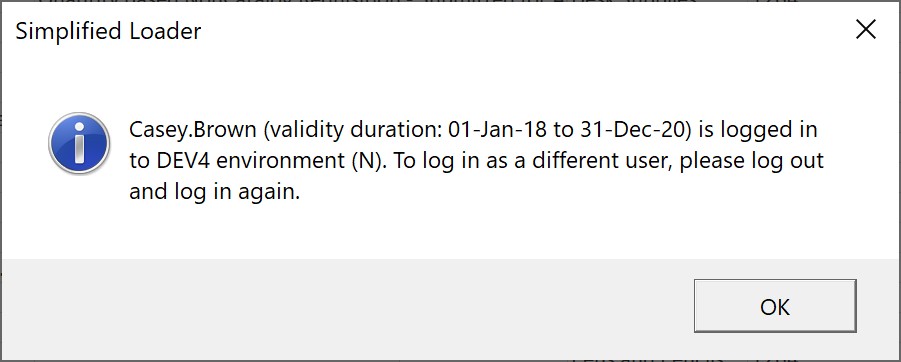
6. The user can check whether they are logged in by clicking the Log In option in the Toolbar. If they are logged in, the following window will appear to confirm.
Non SSO Login
The Non-SSO login procedure is followed when the user normally uses the User ID and Password fields displayed in the following standard Oracle Fusion login screen.
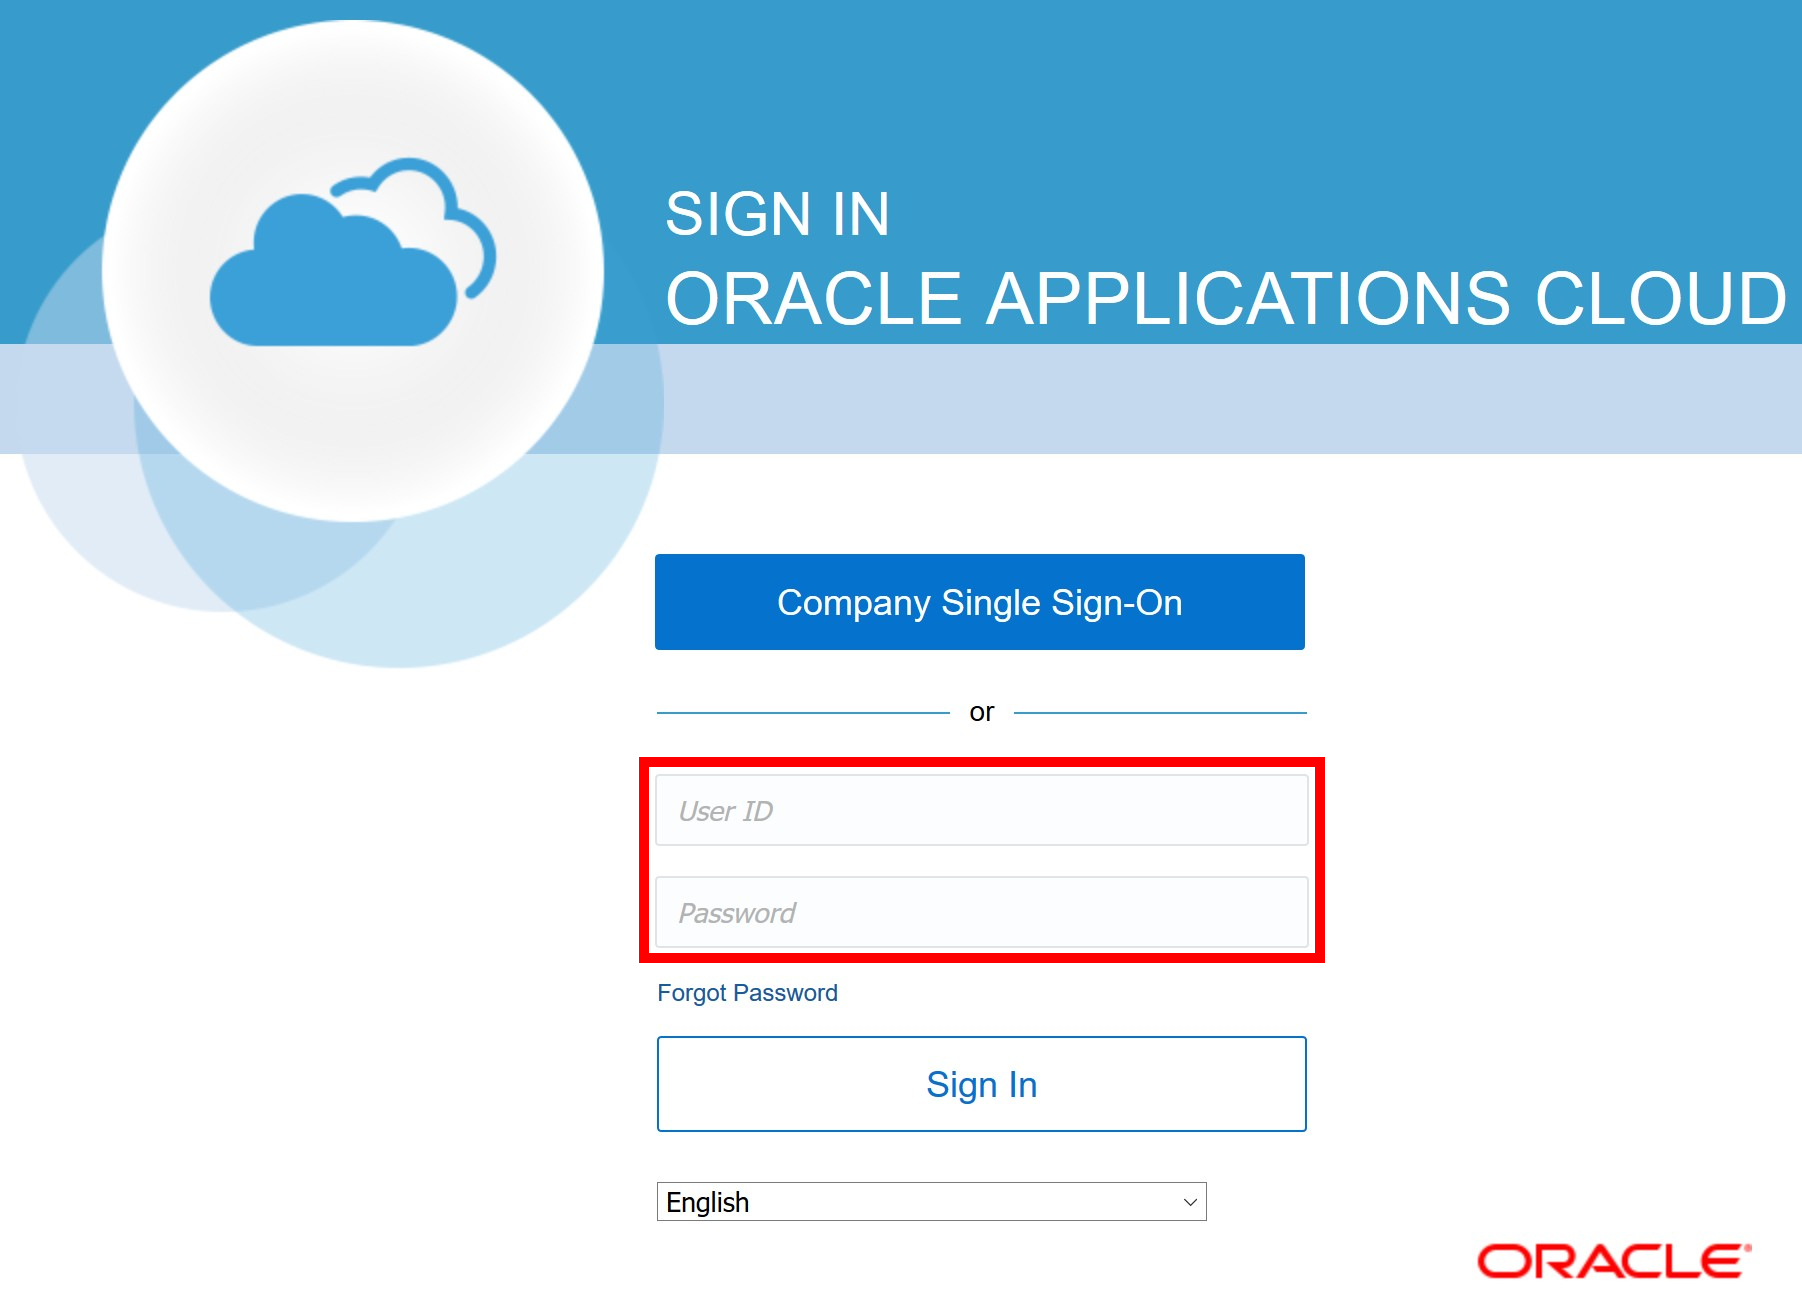
If the user normally logs in to Oracle Fusion using the standard Oracle Fusion login page. In that case, they can utilize Simplified Loader's Log In window to log in directly from a Simplified Loader template.
1. Enter User Name and Non-SSO Password
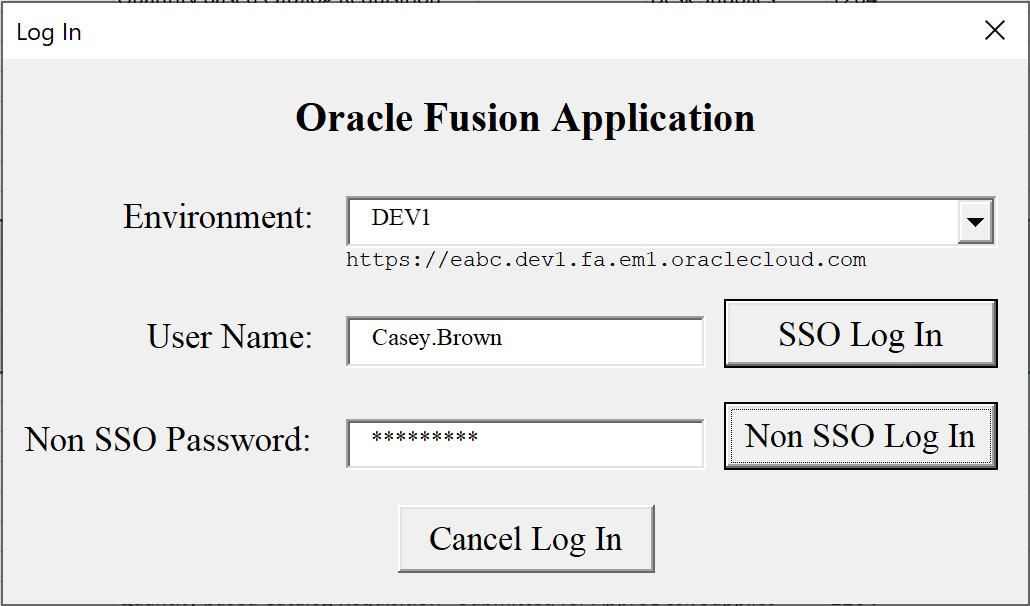
2. Click the 'Non SSO Log In' button to validate the user's login credentials.
3. After successful validation, the Log In window will close, and the user will now be ready to upload and download data from Oracle Fusion.
4. The user can check whether they are still logged in by clicking on the Log In option in the Toolbar. If they are logged in, then this will be confirmed by the appearance of the following message.

Log Out
To end a user session, click on the Logout button.
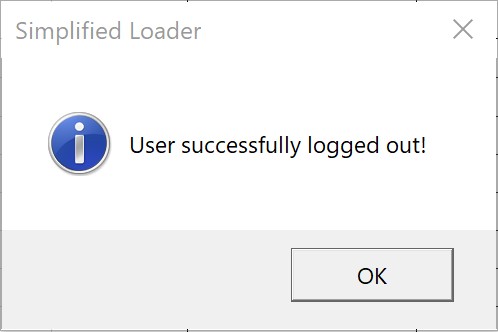
NOTE: The session automatically ends when the user closes the Excel template file.
Handling data
Performing operation on data 
Using the operations buttons in the Operation section of the Simplified Loader toolbar, data is downloaded or uploaded from the DataSheet. The user can act on all or selected records entered in the DataSheet.
1. To selectively upload data records, highlight the entire row of the relevant records by clicking the row number in the worksheet.

2. Simplified Loader will now only process the data in the selected records.
3. When no rows are highlighted, the user receives a pop-up message to confirm if they want to act on all rows in the sheet.
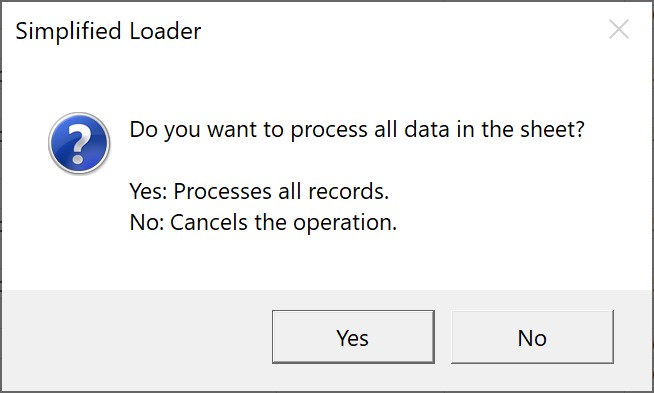
4. Clicking Yes sends all the transaction data in the sheet to Oracle Fusion.
Examples:
a. Uploading selected transactions
- Enter data in DataSheet
- Select the required row or rows within the DataSheet and click on an operation in the Operations section of the Simplified Loader Toolbar.
NOTE: Only data entered in the fields marked as 'Relevant Fields' in the About worksheet will be sent to Oracle. Please see the About Sheet section of this User Guide for more information.

- The user receives a response from Oracle Fusion. The response may contain data values in additional fields. If this is the case, the response overrides any existing values in the data fields.
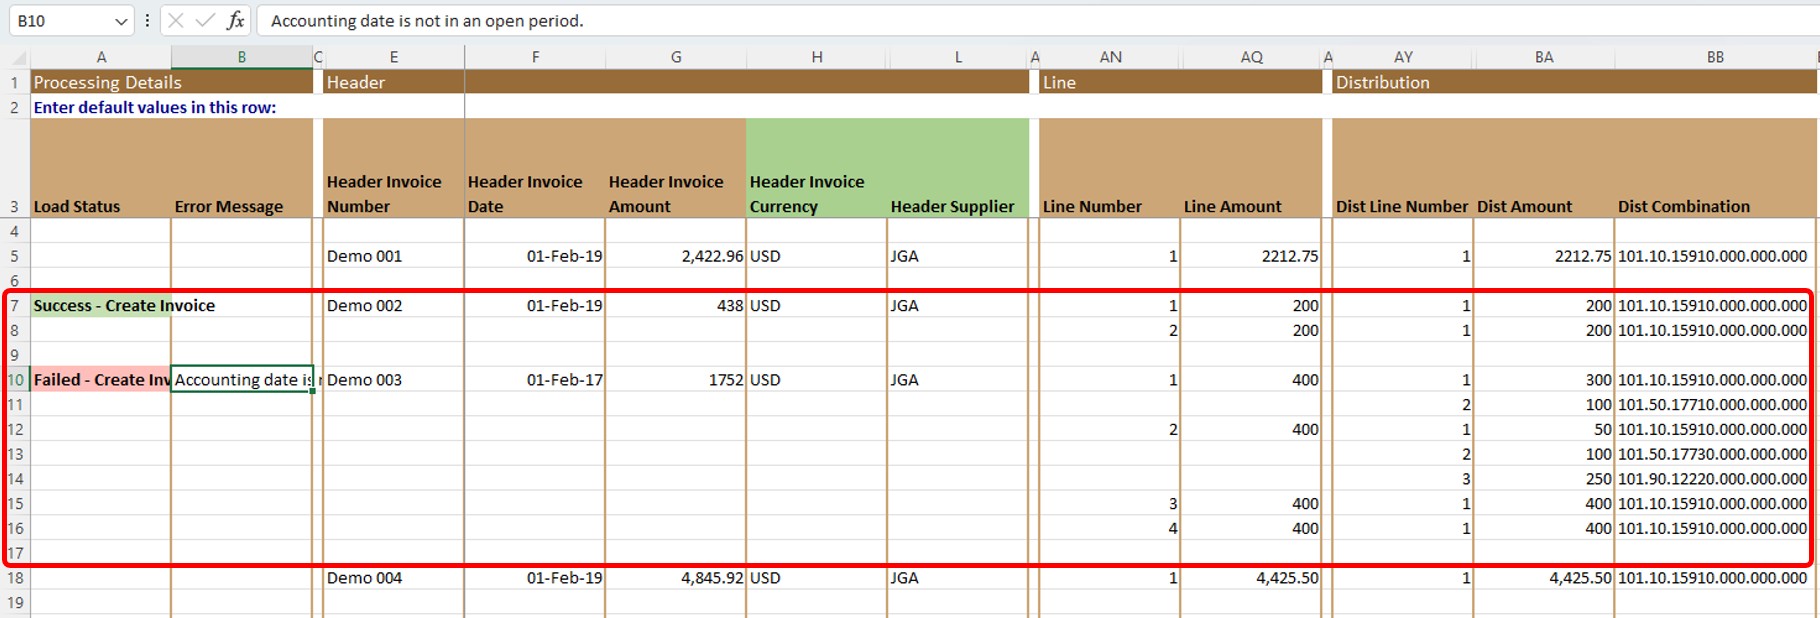
b. Uploading all records entered in DataSheet
- Enter data in the DataSheet
- Do not select any Excel row and click on the desired operation.
NOTE: Only data entered in the 'Relevant Fields' fields in the About worksheet is sent to Oracle Fusion. Please see the About Sheet section of this User Guide for more information.

- Users receive a pop-up message.

- The user receives a response for all the records present in the DataSheet. The response may contain data values in additional fields. If this is the case, then the response will override any existing values already entered into that field by the user.

c. Get transaction details
- Enter data in DataSheet
- The user may select a few records or process all records in the DataSheet.
NOTE: Only data entered in the 'Relevant Fields' fields in the About worksheet will be sent to Oracle. Please see the About Sheet section of this User Guide for more information.

- The user receives a response from Oracle Fusion. The response may create one or multiple records.
- If the response contains multiple records, then Simplified Loader will insert a new line and populate the next level of details in the row or rows below.

Updating Transaction 
To update a transaction in the Simplified Loader Excel template, the user should populate only the relevant fields in the DataSheet. To identify the relevant fields for an update operation, the user must know the primary key associated with the transaction. A primary key is typically the identifying field of the transaction, such as an ID field, a unique transaction name, or a transaction number field. Entering the value in the primary key field ensures that the Simplified Loader updates the correct transaction. In addition to populating the primary key, the user should also populate the fields they wish to update. It is essential to avoid populating any fields other than the primary key and the fields that require updating. Populating additional fields during an update operation will cause the Simplified Loader to send all those populated fields for updating. Sending unnecessary data to Oracle for updating is inefficient and may result in additional validations for fields that are not intended to be updated.
The screenshots below demonstrate steps to update the Invoice Description field on an invoice. The fields and operations may vary depending on the task the user wants to perform:
1. Retain only the Invoice ID (primary key) and the Invoice Description field in the DataSheet.

2. Update the value in the Invoice Description field with the desired new value.

3. Perform the update operation by selecting the Update Invoice operation.

4. The transaction is successfully updated.

Update Field Value to NULL (Keyword: SL_NULL) 
The Simplified Loader allows users to update transaction field values. Typically, users enter the updated values in the Simplified Loader template and perform the update operation. However, updating a field to NULL requires a specific approach, as leaving a field blank in the Excel template will cause the update operation to ignore the field. To explicitly update a field value to NULL, instead of leaving the field blank, use the SL_NULL keyword. The Simplified Loader will recognize SL_NULL as an instruction to set the field value to NULL.
The example in the following screenshot will set the value of the Header Description column to NULL.

Function SL_CopyAboveValue 
Simplified Loader templates download data in a structured format from Oracle Fusion. The Header record appears only once and does not repeat for each line transaction. When updating a specific Line record, such as a second Invoice Line, users must copy the required transaction attributes from the Header record to the specific lines before making updates.
Simplified Loader simplifies the process of copying header attributes to the line level process with the SL_CopyAboveValue function. Users only need to enter this function in the template, and it will automatically find and copy the first available value from the rows above.
The screenshot below shows the formula used in cell D9, which copies data from cell D5.

Field Data Types 
DataSheet fields accept data input in one of the following data types.
- Character
- Number
- Date
- Date Time
- Y / N
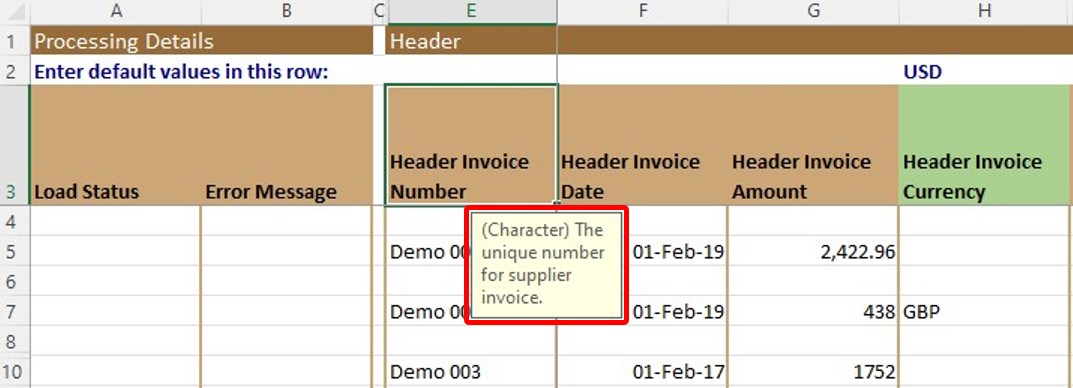
The user can find the data type associated with the column by clicking the column header field in row 3 of the DataSheet. This displays a pop-up message containing data type within a square bracket followed by the field description.
When entering a value for Date and Date Time data type, the user can enter the date value in the format they prefer to use in Excel. Simplified Loader template adapts to the format entered by the user.
Language Support 
There is no language restriction to enter values in DataSheet. Simplified Loader template supports the Unicode character set, meaning a user can enter data in any language.
Status of Operation 
The DataSheet contains Load Status and Error Message columns that indicate whether an operation has been successful or not and, in the case of a failure, an error message stating the reason for a failed transaction.

Default Values 
Default values save time by reducing the amount of manual data entry required whenever the Simplified Templates are used to create or update multiple data records within Oracle Fusion. For example, suppose a user is uploading several Invoices. In such cases, the common values can be set as default values in the Simplified Loader template. The user can assign default values to any field in the Simplified Loader template. Enter the default values in row 2 of the DataSheet.

NOTE: For Default values to apply to the transaction, there must be at least one relevant field value populated for the given section in row 4 onwards.
Data Field description 
Each data field in the DataSheet has an associated description. To view the data field description, click the column header cell in row 3.
Upload Data Format
Data to be uploaded to Oracle from Simplified Loader templates needs to be entered into the DataSheet. Using Simplified Loader templates, users can upload single or multiple records at the same time. Where records contain 'parent-child' data relationships, the user should enter them in the format shown in the example below. Examples of parent-child data relationships include:
- Invoice Header may contain one or many Lines.
- Each Invoice Line may contain one or many Distribution.

In the above example:
- Invoice 01: Contains one parent (header) record, one child (Invoice Line), and one grand-child (Invoice Distribution).
- Invoice 02: Contains one parent (header) record, two childs (Invoice Lines), and one grand-child (Invoice Distribution) each for each Invoice Line.
- Invoice 03: Contains one parent (header) record, four childs (Invoice Lines), and multiple grand-childs (Invoice Distribution) each for each Invoice Line.
There is no limit on the number of children to include within a parent.
Rearrange or Delete columns
The DataSheet contains a column for each data field relevant to the specific Template. For example, the Simplified Loader Payables Invoice template lists all 270 data fields within the Oracle Payable Invoice WebService.
Users can delete and rearrange (i.e. move) any columns they do not wish to use. A copy of the Template with repositioned or deleted columns can be saved and reused later.
Add custom columns
The users can add columns to analyze data using formulas or store values for information purposes. New columns must not use the reserved field names listed in the About worksheet.
Get Lookup Values
Simplified Loader Templates utilize lookup values stored in the Template to enter data in the DataSheet using the list of values. The Get Lookup Values option in the Simplified Loader toolbar refreshes the lookup values when required. The lookup values are pulled from Oracle Fusion.

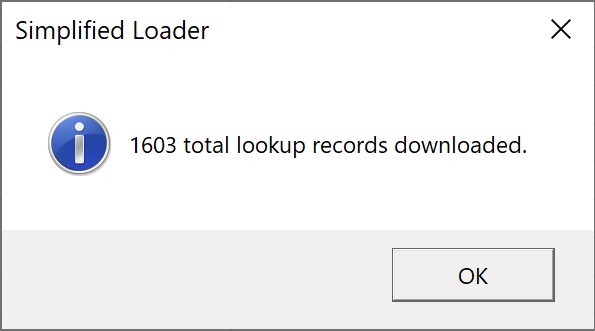
On clicking the Get Lookup Values option, the existing values stored in the Template are replaced with the full set of Lookup values downloaded from Oracle Fusion. The following message is displayed as confirmation of the Get Lookup Value operation:
Using Lookups in the DataSheet
The Lookups worksheet contains values that can be used when entering data into some of the fields in the DataSheet. They consequently help to reduce input times and improve data accuracy. In the DataSheet, the titles of the columns where lookups apply are displayed with a green background.

To utilize Lookup values when entering data in the DataSheet, the user needs to:
- Double-click on the cell where a Lookup value is to be entered
- The 'Filter Lookup Values' form opens with the ability to search the relevant values
- Enter the search criteria in the Filter Lookup Values form and press 'Filter (Ent)'. This will filter records in the Lookup table.
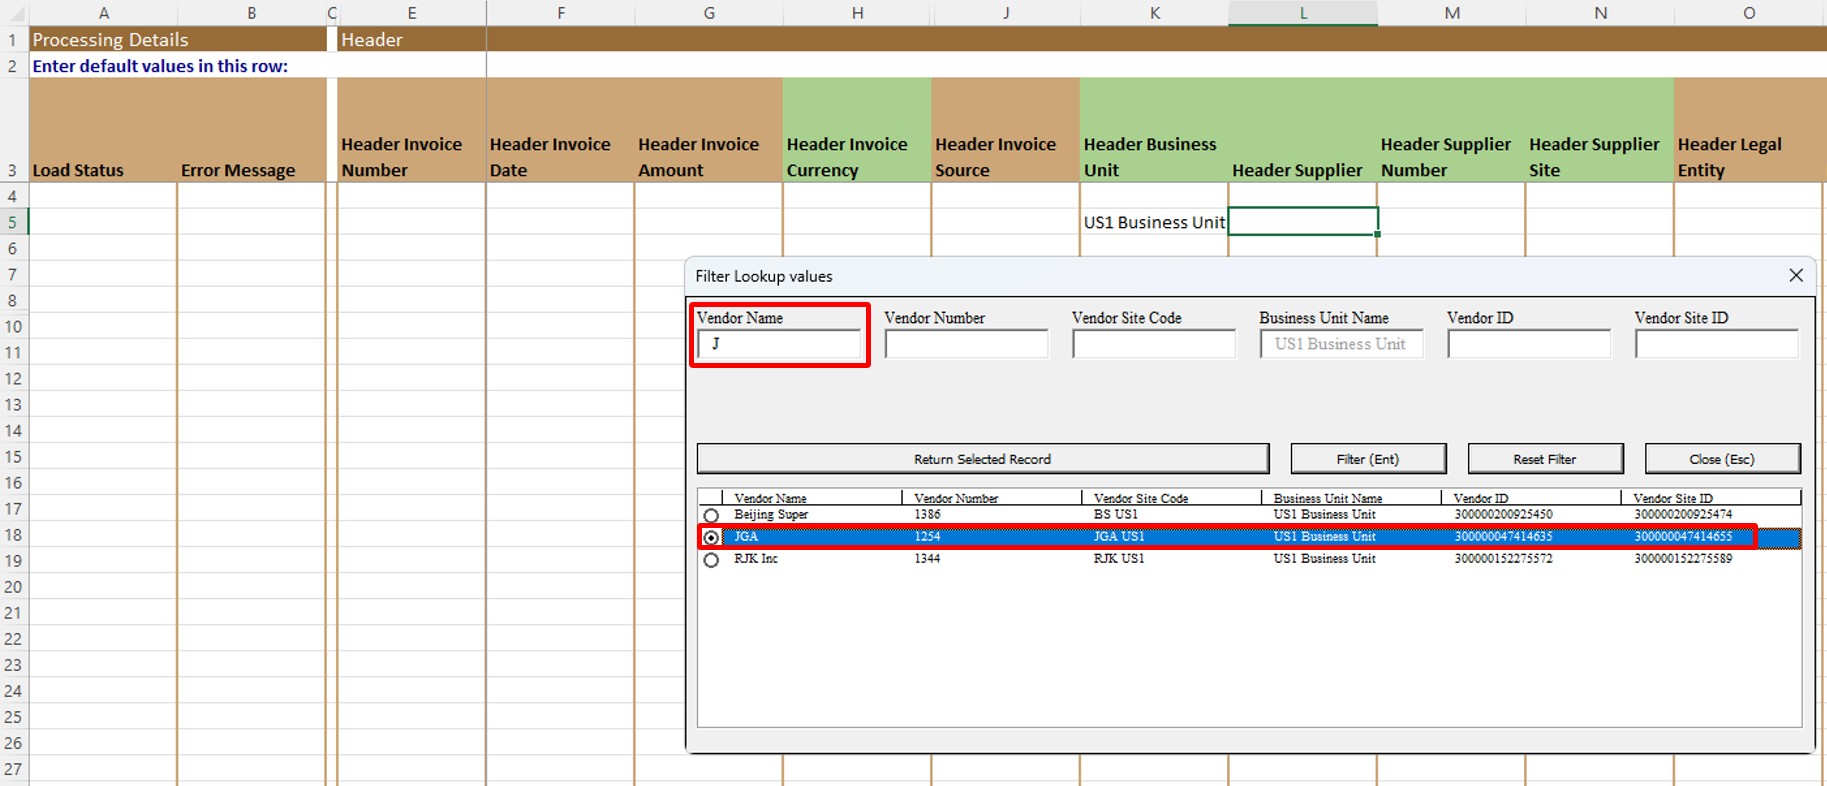
- To select a value, double-click on the relevant record or select the radio button in front of the lookup value and click Return Selected Record.
- The Lookup value will then be copied to the DataSheet.

- Lookup functionality also populates any related field values. For example, selecting Header Supplier will also fill the values in the 'Header Supplier Number' and 'Header Supplier Site' fields.
User Preferences
Template Details
The Template Details section of the User Preferences includes Template Version, Active Dates and Allowed Users.
Whenever the user is asked to provide the Template Details (e.g. by the Simplified Loader Support team), the version details can be displayed by clicking on User Preferences in the Setup section of the Simplified User Toolbar display the window below.
.jpg)
Connection Setup
Please click here to know more about Connection Setup.
Real-time validation
Users have the option to validate data as it is entered in the Simplified Loader Templates.
This option can be selected by clicking on the User Preferences in the Setup section of the Simplified Loader toolbar and ticking the 'Real-time validation' checkbox.
.jpg)
'Real-time validation' works by checking data entered in the DataSheet against values in the Lookups sheet. Consequently, it can be used offline where necessary. Whenever an incorrect value is entered, the cell is highlighted, and the font colour of the entry changes to Red.

Validate before upload
Use this option to validate data before uploading to Oracle Fusion.
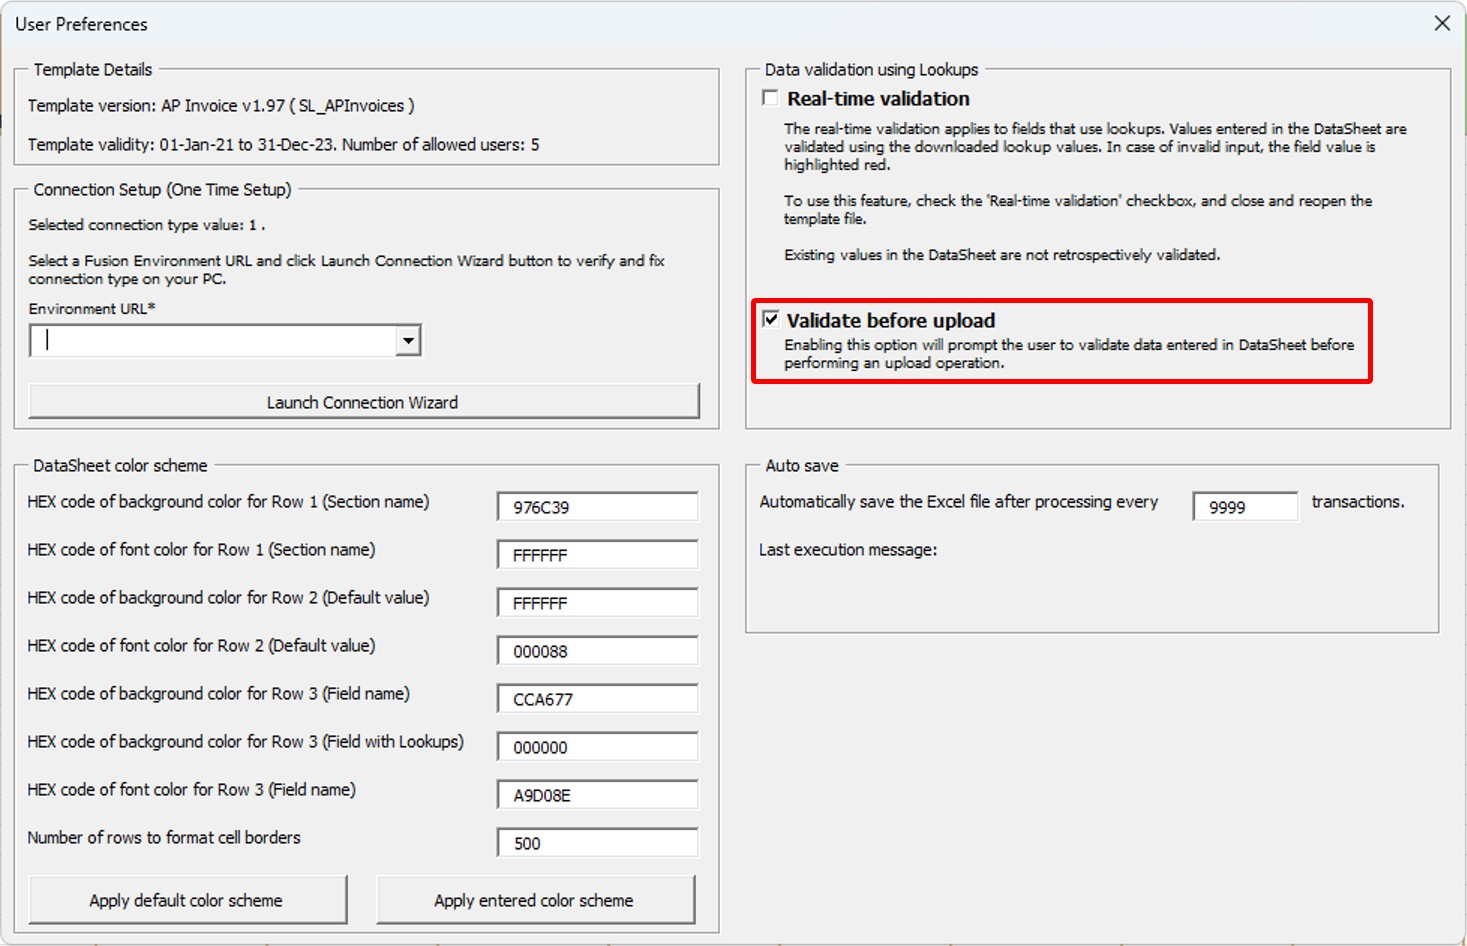
After enabling this option, the following pop-up message appears whenever the user performs an operation requiring data validation. In the pop-up message, the user can select the 'Upload' option to send data to Oracle Fusion. The 'Upload' option is the default behaviour. When the user selects the 'Validate Only' option, the selected data is validated using the Lookup values stored locally in the Template.
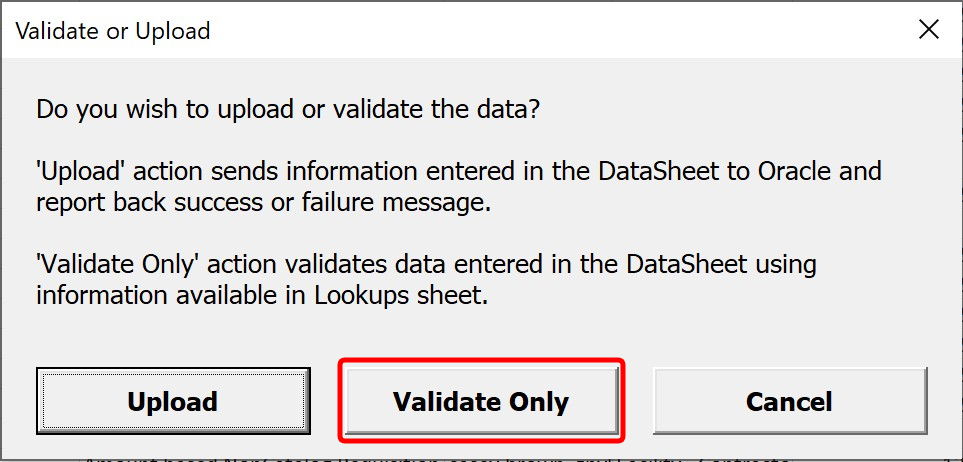
The Validate Only option can be utilized offline. The checks involving interdependencies between data values, e.g. selecting the Line Items based on the Purchasing Business Unit, are also performed by the Validate Only check.
